
Click here to go to the PocketGPSWorld Speed Camera Database

Applies to following models:
TomTom GO 910, x20 (520, 720, 920), x30 (530, 730, 930), x40 (540, 740, 940) & x50 (550, 750, 950) models.
Firstly you need to be a subscribed member of the PocketGPSWorld site, please see here for information with respect to joining the site.
1. Once subscribed you will be able to access the Speed Camera Download Section of the site and you will be presented with a screen that looks like this:
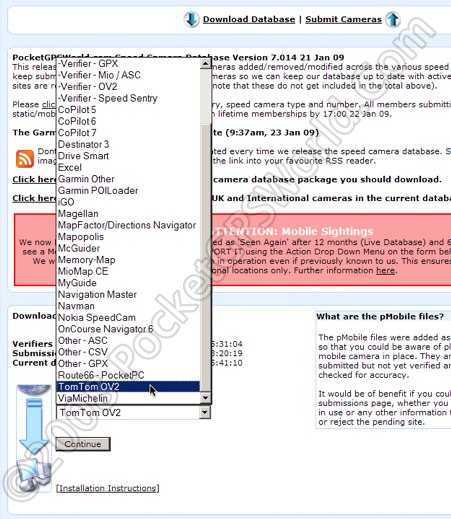
From the Drop down (or pop-up in this case) box labeled "SatNav System" select "TomTom OV2"
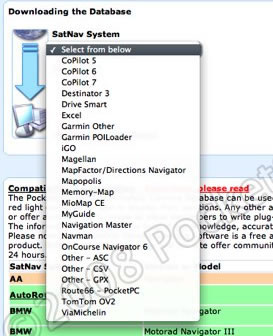
Then press continue.
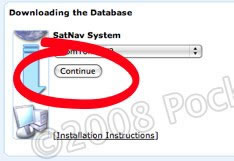
2. The next page of the download sequence will appear as thus:
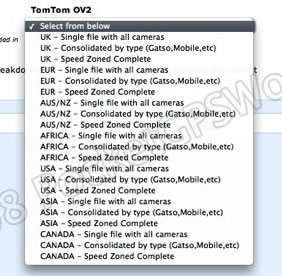
There are a number of options to select from in the "Camera Selections" drop down box:
| UK-Single file with all cameras |
Use this option if you want to minimise the number of custom POI's loaded onto your device.
|
| UK-Consolidated by type |
Contains one file per camera type. Use this option if you want to discern between the different types of camera.
|
| UK-Speed Zoned Complete |
Use this option for the most comprehensive installation, capable of warning the driver of the camera type and the speed limit of the camera.
|
Note: From this point on the write-up will assume you are using the UK Speed Zoned option. All other options can be installed in the same way but you will see less files using the other downloads.
What are the other files?
EUR: |
European Cameras |
| AUS/NZ: |
Australia Cameras |
| AFRICA: |
South African Cameras |
| USA: |
United States Cameras |
| ASIA: |
Hong Kong Cameras |
| CANADA: |
Canadian Cameras
|
3. Once you have decided on which database type you want press the "Download Database" button. If you use Internet Explorer you may have to click on the default security warning to accept the download of the file, then click Save:
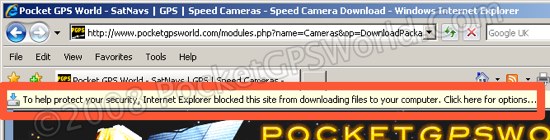
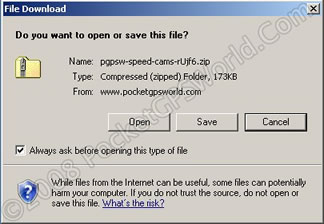
Click the "Save" button
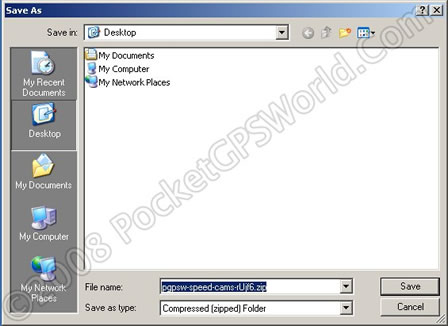
Save the file to a known location on your PC as above (remember where you saved them).
Once the download is complete:

You should now click the "Open" button or if you do not see the above window, locate the downloaded file on your PC via Explorer, right-click and select "Extract All":
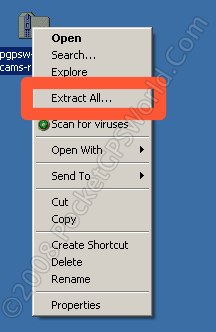
4. This will launch WinZip if installed, if noyt then XP or Vista will launch the Compressed Folders Extraction Wizard.
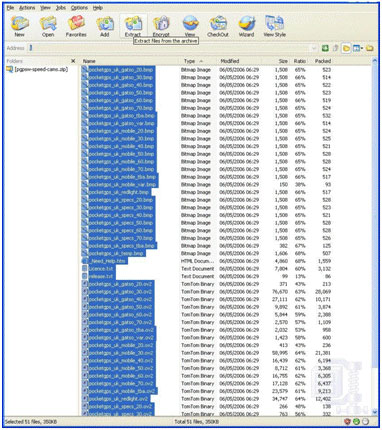
Select all the files and press the "Extract" button at the top, where "Extract files from the archive" is highlighted in yellow on this screen capture.
You now need to specify where you actually want to place the files, the simplest way is to dock your TomTom Go to the PC, switch it on and press connect to PC when prompted by the device.
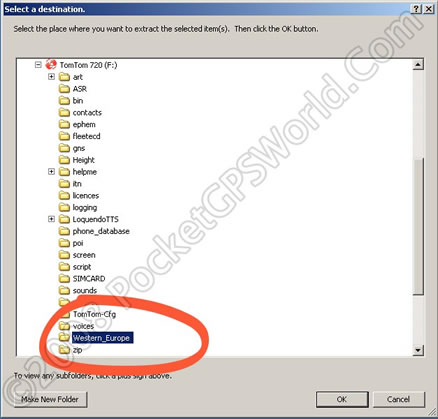
It is now possible to expand the "Extract to" box, locate the icon with the image of the TomTom Go and expand it. In the image above this is drive (F: ), but note this drive letter will change dependent upon the number of drives fitted into the PC. Scroll down the contents of the TomTom device and click the map folder (the name will depend on the map you use, i.e. Western_Europe, Western_Central_Europe, United_Kingdom_and_Republic_of_Ireland etc).
Press the "Extract" button, when this part is complete the files are loaded onto the TomTom device, from this point on the guide uses just the TomTom screen.
5. Please use the TomTom unit directly for this as the TomTom Home software on the PC only allows access to certain configuration options, to do the following un-dock the TomTom from the PC.
Fire up the unit but do not connect to the computer. It is possible to do this whilst powered from the PC but NOT controlled by it.
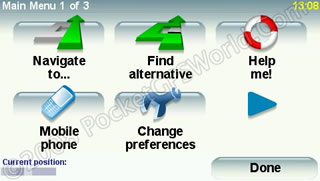
Tap the screen then select
"Change Preferences"
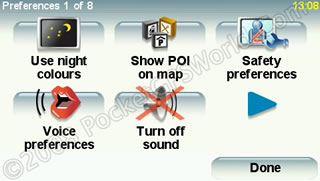
Tap the Arrow Right icon to get to page two as shown below:

Select "Manage POI"
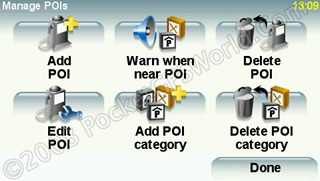
Select "Warn when near POI"
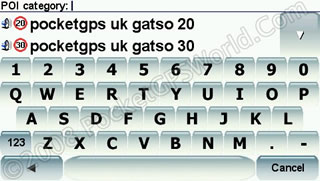
You need to use the up/ down arrows to locate the Pocketgps POIs, once you find one select it by tapping it in the list.
Note if you have installed the Speed Zoned set you might want to cross them off the list at the end of this guide, it can get confusing if not.
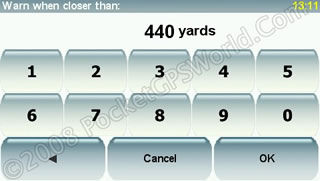
Set your Warning distance, this can be altered to reflect time in seconds by some simple mathematics,
A guide table with suggested settings is provided here:
|
10 seconds |
15 seconds |
20 seconds |
25 seconds |
30 seconds |
20 MPH |
98 yards |
147 yards |
196 yards |
244 yards |
294 yards |
30 MPH |
147 yards |
220 yards |
293 yards |
367 yards |
440 yards |
40 MPH |
195 yards |
293 yards |
391 yards |
489 yards |
586 yards |
50 MPH |
244 yards |
367 yards |
489 yards |
611 yards |
783 yards |
60 MPH |
293 yards |
440 yards |
586 yards |
733 yards |
880 yards |
70 MPH |
342 yards |
513 yards |
684 yards |
855 yards |
1027 yards |
For Mobile locations we recommend the following distances are used:
|
Distance |
20 MPH |
400 yards |
30 MPH |
600 yards |
40 MPH |
800 yards |
50 MPH |
1000 yards |
60 MPH |
70 MPH |
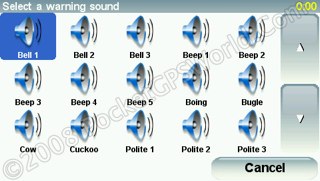
Here you can choose your preference for alert. You can choose from one of the pre-installed beeps and boings by selecting 'Sound effect' or alternatively use the Text To Speech capability of the device by selecting 'Type in your own warning'.
Alternatively, you can use one of our .ogg file real voice packages. The download and instructions for these can be found here.

Make your choice and continue. The options available will differ dependent on what option you chose.
At the end, you will see this screen, choose YES if happy, choose NO if you wish to return to the sound selection screen:

The final set up screen:
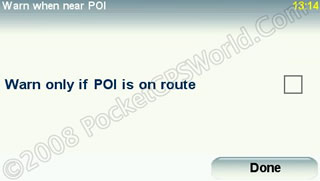
If you select this and then use the device without setting a route you will get no warnings, setting it can reduce the number of "False" alarms, but not ticking the box is what you should do for simply driving around.
The choice is yours, personally I do not select this option and accept the odd false alarm.
Now go back to the start of the configuration and repeat this operation for each of the additional cameras you have loaded to the device.
Here is a quick guide to all the files you need to configure if using the fill SpeedZoned Set:
GATSO |
20 |
MOBILE |
20 |
SPECS |
20 |
Redlight |
GATSO |
30 |
MOBILE |
30 |
SPECS |
30 |
|
GATSO |
40 |
MOBILE |
40 |
SPECS |
40 |
|
GATSO |
50 |
MOBILE |
50 |
SPECS |
50 |
|
GATSO |
60 |
MOBILE |
60 |
SPECS |
60 |
|
GATSO |
70 |
MOBILE |
70 |
SPECS |
70 |
|
GATSO |
TBA |
MOBILE |
TBA |
|
|
|
GATSO |
VAR |
|
|
|
|
|
Remember, tick off the list as you configure the device. this is a one off procedure, you do not need to repeat the warning configuration each time we release an update. For subsequent updates simple download the new file and copy across to the device (steps 1 -4 above).
IMPORTANT: PLEASE BOOKMARK THIS PAGE NOW FOR FUTURE REFERENCE
Add this page to your list of favourites/bookmarks. Please right click here.
NEED HELP? - > - > - > |
Please note that the safety camera warning software is a free add-on to membership and as such is not a commercially guaranteed product. Both the camera database and the site offer community support and help only. That said, the answers to the vast majority of questions are provided within 24 hours.
Click here if you have membership sign-up problems.
Click here if you're downloading problems after reading the instructions above. |
|