Review by Darren Griffin
Introduction
TomTom's GO range of PND navigation devices needs little by way of introduction. The TomTom brand has had a meteoric rise to fame. Indeed it is now synonymous with satellite Navigation in the same way that Hoover is with Vacuum cleaners.
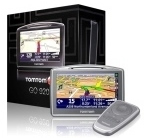
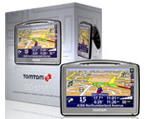
The GO x20 range was introduced with some fanfare in Cannes, France last summer and initially consisted of the 520 and 720 models only. These proved very popular but strangely there was at the time no replacement announced for the 910, the flagship of the range.
Despite fervent denials from TomTom when asked of its existence the 920 finally popped its head up above the parapet in time for the Christmas sales period in Europe. It had already broken cover a little earlier in the US where the requirement for a device capable of holding a single country contiguous US map was more pressing.
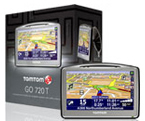
Although this will primarily be a review of the 920T model, because the vast majority of features are also available on the other x20 family units, the 520 and 720, much of what is written here applies to all. I will summarise the key differences in specification where they occur but so far as form factor is concerned, the units are identical (apart from a different colour front bezel and different shade of rubberised coating on the 920!).
The 920T differs from its stable mates in having more internal memory (4GB), necessary to contain the full European Map (inc the Canaries Map), Guam and of course North America (United States and Canada). It also comes with a Bluetooth remote control (extra cost option on other units) and Enhanced Position Technology (EPT). EPT enables position information to continue to be calculated and displayed in areas where satellite signal has been lost such as tunnels, urban canyons etc. The technology utilises a solid state accelerometer and gyroscope that can calculate acceleration/deceleration and lateral movements.
All the x20 models have the latest Version 7 Navcore software installed which adds features such as MapShare (more on this later), HelpMe, FM Transmitter and Voice Address Input.
Although prices printed in reviews are quickly rendered meaningless in the world of satnav I have added them in the table below to give an indication of the comparative cost differences between each model. Please research the current deals before purchase though!
|
920T |
720/720T |
520/520T |
|
|
|
|
Enhanced Positioning Technology |
Yes |
No |
No |
Internal memory |
4GB |
2GB |
1GB |
Maps |
Western Europe
USA Canada |
Western Europe |
Single Region |
RDS-TMC Traffic Receiver Included |
Yes |
Only in T version
Other Version Additional Cost |
Only in T version
Other Version Additional Cost |
Bluetooth Remote Control
|
Yes |
Additional Cost |
Additional Cost |
Guide Price
(Correct as of 31 Jan 08)
|
£294.00 |
£224.00
T Version £247.00 |
£173.00
T Version £212.00 |
Note: In Europe, the 920 is only available as the 920T with bundled TMC Traffic Receiver. 520 and 720 models can be purchased with TMC receiver as 520T and 720T or without as standard 520 and 720. US customers can choose between the 920 and 920T models.
The TMC receiver is approximately £45.00 when purchased on its own. |
Design
The x20 model design is clearly an evolution rather than a revolution when compared with the x10's that they have replaced. From the front they share many of the same design characteristics as the x10's but benefit from a larger screen, the same screen in fact that has been seen already on the ONE XL.

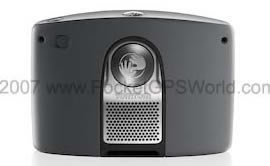
Of most interest though is the thickness. Unlike the bulbous x10 range, the 920 (and 720, 502) has gone on a very strict diet and is now slim and svelte, a mere 24mm thick.
The PR images released by TomTom show it being slipped into a shirt pocket and it fits just as well as the image might suggest. Indeed so slim is it that whilst on review I left the house for a trip to the supermarket supposedly with 920 in hand. I got to the car and realised I'd forgotten it. As it was pouring with rain (and being lazy!) I decided I could manage without and carried on. Only when I got out of the car at the supermarket did I realise that the GO was in my back trouser pocket, it is so slim that it felt just like my wallet! Luckily it survived my sitting upon it!
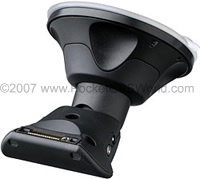
The cradle mount has also come in for a major rethink and not a little criticism as a result. The x10's had a complex mount that contained connections for power, external antenna, TMC accessory (Traffic Information), external microphone etc. It was slated for being difficult to attach to the windscreen and for being fiddly to attach the GO to but it was comprehensive in its capabilities.
So TomTom went back to basics quite literally and designed a new mount that was devoid of any connectivity options whatsoever (apart from attaching to the x20 itself!) So simple is the new mount design that it has even shed the standard suction lever system used by every other mount. Instead it has a 'petal' arrangement and is affixed to the windscreen by pressure alone. The GO simply slides onto the mount and all electrical and interface connections are made direct to on the device itself.
 x10 Mount
 |
|
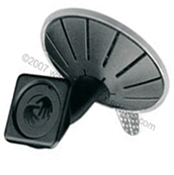 x20 Mount
 |
I actually spent some time discussing this about face with their design team and a lot of what they said in explanation made sense. Whilst many of us decry the loss of an 'active' mount that has power connections etc, the simple fact is that theft of these devices from cars is a huge issue in most territories nowadays. Active mounts encourage owners to be lazy. They will spend time routing cables so that they are hidden and tidy and consequently they are less likely to remove the mount when leaving the car unattended. Leaving any evidence that a satnav may be in the car is all the encouragement a thief needs. And so the simpler design presented on the x20 makes it as simple as possible to remove and lock in the boot out of sight, no excuses now!
Of course the flip side is that you have to attach all the cables each and every time you use the device. In the case of the 920T reviewed here that means power and TMC antenna. It takes only a few seconds to do but it is irritating nevertheless, especially when you are blindly trying to locate the power and antenna connections located underneath the device by feel alone!
The mount however works very well, despite being as simple as it possibly can in design terms, it sticks to the screen like a limpet and doesn't droop (an issue that plagued the x10's). The unit clicks on and off the mount with ease. If you still want an active mount solution (I did!) then I have reviewed two excellent options, see the links here.
Unlike previous devices, all the x20 GO's now store their supplied map data on internal flash memory leaving the SD card free for other duties. This gives almost unlimited expansion possibilities. You can use memory cards to store extra maps, MP3 files, audio books etc and as the capacity of memory cards increases each year and their prices comes down this greatly enhances the long term viability of the device. A recent update to the x20 firmware has also now added limited SDHC support. We are collating a list of SDHC cards that are known to work.
In the Box
If you are a gadget addict then this is always the best part. Ripping open the box reveals the 920 itself beaming back at you. Even the packaging has been well thought out (very Apple) with the device in its own windowed box within a box.
Lift this out and underneath you find the CD and Quick Start Guide. Underneath this is a flap which conceals the mount, dock, charger lead, remote control and TMC antenna.
The dock allows you to charge the device from a spare USB port on your home computer, it also simplifies updates using TomTom's HOME application. When connected to your computer via the dock and switched on it will prompt you 'Do you want to connect to 'Computer'? NO/YES".
You will note that no separate mains charger is supplied in the package. To charge the unit you will either have to plug it into your car or leave it connected via the dock with your computer. As it uses a standard mini-USB connection for data connectivity and power you can however use any Mini USB charger to top up the battery if you prefer.
So in summary, the box contains:
|
|
Go 920 Device |
|
|
Home Dock |
|
|
Windscreen Mount |
|
|
TMC Antenna |
|
|
12v Car Charger lead |
|
|
CD-Rom containing TomTom HOME software and electronic manual |
|
|
Bluetooth Remote Control |
|
|
Quick Start Guide and accessories brochure |
In Use
I switched on the 920 whilst sat at my home office desk and it locked onto the satellites and calculated my position within 22 seconds, not bad for a brand new unit. I inserted the supplied CD into my Mac (the CD comes with both PC and Mac compatible HOME installation packages) and installed the HOME desktop application. This took a few moments and having connected the home dock to my Mac I switched it on, answered yes to the 'Connect to computer message?' on screen and waited.
After a few seconds the 920 appeared as a disk drive on my desktop. You don't actually need to use HOME if all you wish to do is copy across POI files or Custom Cursors, custom voice alert files etc.
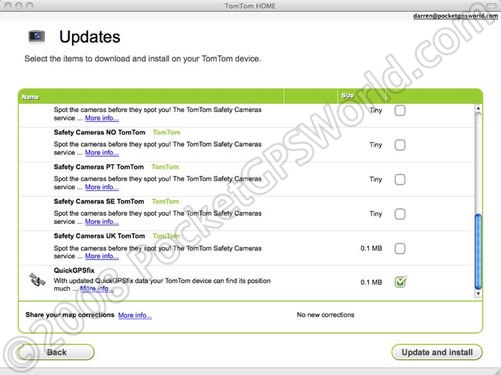
Upon launching the HOME application it immediately detected the connected 920 and prompted me to create an account. below is the screen you see once connected. Every time you connect HOME checks with TomTom to see if there are any updates available. This includes application updates, QuickGPSFix data updates and any updates to PLUS services such as safety cameras.
As you can see from the image below I have deselected the TomTom safety camera updates because ours are better and I value my clean licence. Quite how TomTom get their safety camera data so wrong is rather concerning and it is not something you want to take a chance with is it?
QuickGPSFix is a system that downloads the satellite location data tables so that your unit has a head start in calculating its position. Without this it would have to obtain the same data from the satellites themselves thus slowing down the initial fix calculation. HOME will prompt you to update your QuickGPSFix data if a newer version is available.
HOME Opening Screen
Once you have accepted the updates that you wish to install they are downloaded and installed for you. You will then see the main screen as seen below.
From here you can add download new or updated maps from TomTom's store (TomTom have a 30 Day map Guarantee which ensures you get the latest available map release when you buy a new device), you can also get Map Share map corrections, and on Page 2 you can perform a device back-up (this should be the very first thing you do but more on this later) and add/remove POIs, Custom Map Colour Schemes, cursors etc.
 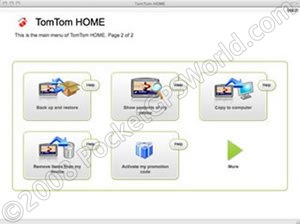
Main HOME Screens
Backups
Ok before we drift off track let me cover the issue of Backups. The VERY first thing we advise doing is to take a full backup of your device. Don't use HOME's backup facility, connect your GO to your computer, create a folder on your desktop or wherever you prefer and then copy the contents of your device across lock stock and barrel to the folder you created. If you can afford the space take two backups and then store them safely.
No matter what you then do to your device, you can always restore it to its out of the box state and start afresh if things go wrong. I've lost count of the amount of users who have begun customising their device or had a software update hang mid-update and been left with a dead device as a result of not having a backup to hand. So BACKUP! If you have a GO and are reading this or indeed any device, and don't have a backup take one NOW! Don't say I didn't warn you!
We don't advise using HOME to backup your device because experience has shown that the backups it creates aren't always reliable enough to restore from, not a great state of affairs but when taking a manual backup is so simple it is not something worth worrying about (unless you hadn't read our advice on this matter of course).
In Use
Right, now we have taken a backup, lets set it all up and see how it performs in-car. Affixing the windscreen mount couldn't be easier. Make sure the screen is clean and then apply the mount to the glass with firm pressure and it will hold like it has been welded to the glass. To remove you have to lift the pull tab, you can hang off the mount and it won't budge, very impressive!
It may take a little practice to clip the device to the mount but once you've done it a couple of times it becomes second nature. All that remains now is to plug the cigarette lighter charger lead into the bottom of the device (it's a Mini-USB lead) and plug the other end into the cigarette lighter socket or accessory power outlet. there is a small LED indicator at bottom right of the unit that indicates if external power is being supplied.
One more word of advice here. The correct position for a satnav is either centrally located at the base of the windscreen or again at the bottom of the windscreen on the right of the steering wheel (or the left if you drive on the wrong side of the road!). Sticking it under the rear view mirror, right in front of your eyes or over an airbag is not the correct place yet I see drivers every day who think it is!
The power switch is located on the top right, press it firmly for a second and the unit will power up first displaying the TomTom Start-Up Splash Screen (which can be replaced by an image of your choice if you wish).

The Default Splash Screen
|

And One I created Earlier (As Blue Peter would say!)
|
And then it will display the map screen. In the images below you will notice that the left hand one has not yet calculated its position so instead shows a grey map display with the last know location. Once a satellite fix has been obtained the grey background reverts to colour and the satellite signal strength is displayed as in the image on the right.
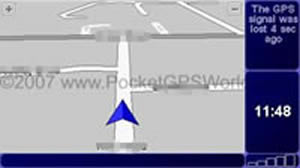 No Satellite Signal
 |
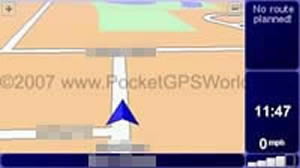 Satellite Signal Received
 |
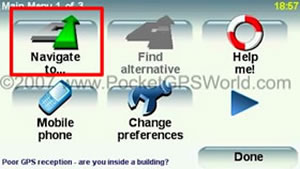
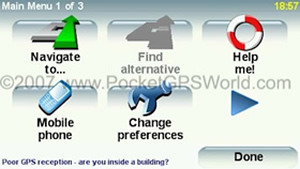
From here you could simply drive-off and have the TomTom operate in moving map mode displaying your current position on the map. But most will want to use it for directions. To enter this mode you access the menu system by tapping the display with a finger.
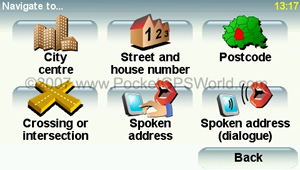
To Navigate to a new destination you tap the 'Navigate to..." button. The next screen gives you further options, you can navigate to an address, a favourite (a previously saved destination), a recently visited destination, a POI and more.
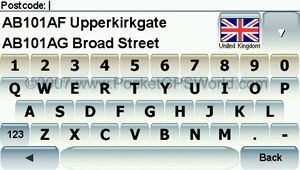
When you select 'Address' you are presented with further options such as 'City centre', 'Street and house number' etc. You then enter your chosen address using an on-screen keyboard and away you go.
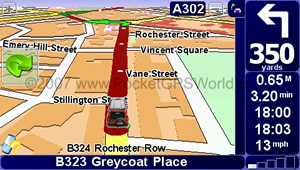
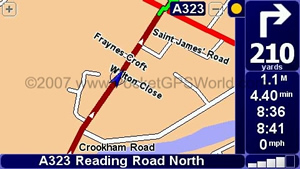
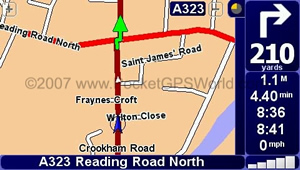
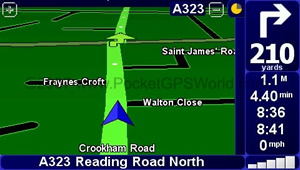
Below is an example of the screen display you would see in navigation mode. It contains all the important information you need in an easy to digest format.
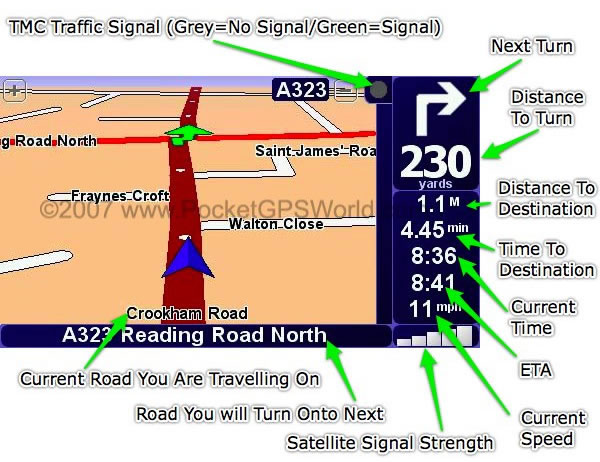
The 920 comes with a choice of Computer or Pre-recorded voices. The computer voice has the ability to read aloud street names and whilst on occasion some of them may sound more Stephen Hawking than Natasha Kaplinsky they do in general work very well. So instead of 'Turn Right in Two Hundred and Thirty yards' you get 'In Two Hundred and Thirty yards Turn Right onto Reading Road North'. This makes navigation much simpler and results in you having to check the display far less often.

Voice Menu
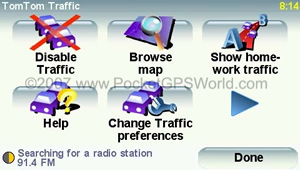
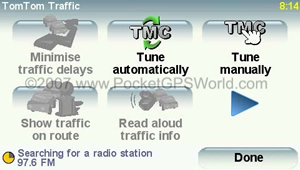
RDS-TMC
There has been much discussion of the merits and issues with TMC. For those of you not familiar with this service I shall try and give a brief overview.
TMC (Traffic Message Channel) is a service available in many European countries. Data on Traffic Flow, Road Works, Accidents and other issues that affect major roads is collated by various agencies, encoded and transmitted as a data signal over the terrestrial FM radio network.
Suitably equipped and licenced devices can receive and decode this data which is then overlaid on the map to show issues affecting traffic on your route.
In the UK this data is collated by two companies who operate separate systems, these are iTIS and RAC-TrafficMaster. It is the decision of the hardware manufacturers as to whose service they use and ultimately pay to access. TomTom use iTIS who were for a long time the only service operator in the UK.
There are two issues with the TMC service and these issues affect both service providers in equal measure. Firstly the signal itself. It is broadcast at relatively low power from a network of transmitters across the UK. This requires an FM antenna in order to tune the signal. Because the antenna is designed to be positioned inside the car around the edge of the windscreen it is very inefficient. Although the situation is improving all the time as more transmitter sites are commissioned there are still large areas of the country where the signal is either non-existent or so low as to have the same ultimate effect.
Factory fit Satnav systems are affected much less by the issue surrounding signal strength as they patch into the car radio antenna for the TMC signal. Some TMC solutions for portable satnav devices have the facility to do the same but TomTom have chosen not to and I admit even were it possible it would be a kludge with yet more wires.
The second issue is the quality of the data. Whilst it is useful, it is nowhere near reliable enough and I would not want to base a decision to detour around a trouble spot on the basis of this data alone, something the makers would suggest is possible. Time and again I have seen dire warning of 10 mile tail backs and 2hr delays only to find nothing when I arrive at the alleged incident. Again this will hopefully improve but I do question how the data can be so wildly inaccurate so often. This is not entirely TomTom's fault as even when testing another device using RAC-TrafficMaster data I found the reports woefully inaccurate. However, on some occasions TomTom's TMC will report a wildly inaccurate and wholly incorrect delay for an incident and this is we believe a fault of Navcore itself rather than the raw data supplied.
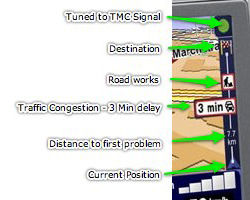
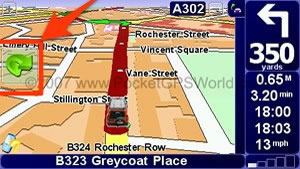
In use you get a small ribbon (see image to the right) that runs along the right of the screen from top to bottom. At the top is a small circle that shows you the status of reception and updates. A green circle indicates good reception and a grey circle indicates no reception.
If traffic issues are detected on your calculated route they appear in the ribbon as small icons with estimated delay times attached as can be seen in the image on the left. Here we can see that there is heavy traffic 7.7km from the current position which will delay us by an estimated three minutes. In addittion, further along towards our destination (indicated by the finish flag at the top of the ribbon) there are road works.
You can get more detailed information by tapping the traffic ribbon with your finger, this takes you to another page where you can cycle through each delay and see exactly what the issue is and where. You can configure the device to automatically re-route you or you can choose to avoid each problem manually.
There is also one other issue worth mentioning. Both the TMC receiver and iPod connectivity kit use the sme connector on the x20's. This means you cannot use them both at the same time.
Enhanced Positioning Technology (EPT)
EPT uses a solid state accelerometer and gyroscope. When the device is switched on and the device has good GPS reception it calibrates collecting data from its sensors for approximately one minute. After this the EPT system initialises. In  conjunction with satellite positioning data it can, when satellite signal has been lost in a tunnel for example, continue to calculate your position. conjunction with satellite positioning data it can, when satellite signal has been lost in a tunnel for example, continue to calculate your position.
The accelerometers measure acceleration and deceleration and the gyroscope measures lateral movements and turns. It is sufficiently accurate to continue to report your position on the map for short periods without satellite data. Although I don't have any tunnels nearby through which to test this feature but I have seen it in operation in a multi-story car park. It was able to accurately calculate my movements through the network of levels and ramps and when in operation displays 'EPT' where the satellite signal strength bars normally appear.
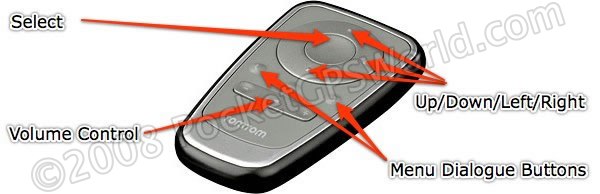
Bluetooth Remote
Unlike previous remotes, the 920's uses Bluetooth technology which does not require line of sight to the device. Using two AAA batteries it automatically pairs with the device and allows you to access a range of functions and traverse the menus. It comes with a plastic holder which can be affixed to the dash and is easy to use.
Pressing the central button opens the menu, surrounding this button is a ring of buttons with which you can move up/down/left and right through the menus. You can even go back a page using the remote, an option not available using the screen directly.
Below this control are three buttons that replicate the dialogue buttons on screen. The remote also has a dedicated volume control.
The only annoyance I found was that the remote took a few seconds to pair the first time it was used in each session. Each time I would forget and wonder why it wasn't operating until the message appears on the display that the remote was connected! I have also been reminded that when you access the 'browse map' function using the remote you cannot pan the map as you would when using your finger on the screen. Instead you can only zoom in/out at your current location. A minor annoyance perhaps but odd that you cannot pan using the remote.
Bluetooth Remote Control
MapShare
This much trumpeted feature allows you to correct errors on your map such as:
- Unblock or block a street
- Correct a one-way street error
- Edit a street name
- Add missing POIs
- Edit existing POI details including name and position
- Add missing streets
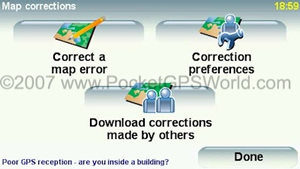 MapShare Main Menu
|
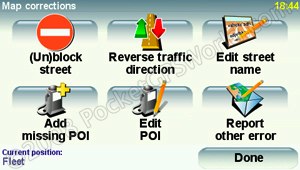 Correction Options
 |
Whilst it is novel it is far from the xanadu that we all imagined it would be. The simpler corrections like reversing traffic flow, correcting a street name etc are all easily achieved. The corrections are then sent to TomTom when you dock your device via HOME.
You can then choose whether you wish to receive corrections from other users, corrections you submitted, corrections from trusted sources etc. This should in theory work well but it doesn't. A recent issue is a good example. A user reported that the A40 was obstructed and submitted a correction. This was approved by TomTom and all those who chose to receive moderated updates received information that the A40 was blocked.
All well and good except the A40 wasn't blocked and never had been! Read the thread on this subject here.
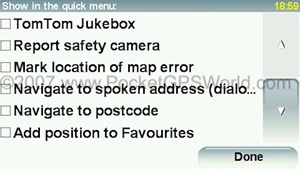
QuickMenu
A minor addition but one worthy of mention. QuickMenu allows you to enable (or disable if you prefer) a shortcut button on the main screen that gives you quick access to whichever features you wish.
There are a number of items that you can can choose from (a maximum of six can be configured). When at least one option is selected you will see the QuickMenu button on the left of the main display as shown below:
 QuickMenu Options Page
 |
|
 QuickMenu Button Visible
 |
| |
|
|
Pressing the QuickMenu Button takes you to your configured QuickMenu Page like this
 |
Other Features
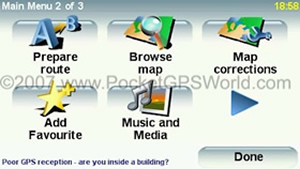
All the other features that you have come to expect of TomTom are present such as full support for third party POI sets, custom voices etc. You can prepare Itineraries that allow multi-stop routes to be planned, easily customise a calculated route so as to avoid specific roads, request an alternate route, change routing options for car, bike, pedestrian etc.
The display is slightly larger than its predecessors and very crisp and clear. It is also much easier to see in bright sunlight and has a sensor that dims the back light as it the outside light changes.
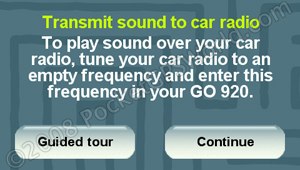
All x20 models come with a built-in FM Transmitter. This allows you to transmit the audio voice instructions and/or music to your car radio. Whilst this sounded like an excellent facility, in practice it was rather a let down. It is very difficult to locate a free radio frequency here in the South and having done so I found myself having to re-tune only a few miles away. The volume level of the transmitted sound is also low and in both the cars I tested this in there was considerable hiss which spoilt the overall experience sufficiently for me not to bother again.
This is a real shame as connected to an iPod using the connectivity kit (extra cost option) you can control your iPod from the GO's screen (although frustratingly the iPod is not charged and the connector is now in-use by the GO so you cannot use another charger). As I mentioned earlier in the TMC section, because the RDS-TMC receiver uses the connection that is used by the iPod Connectivity Kit, you cannot use both at the same time.
 FM Transmitter Setup FM Transmitter Setup
|
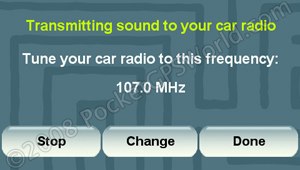 Tuning setup Tuning setup |
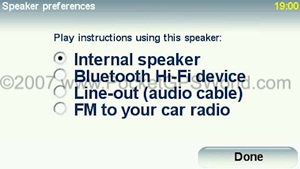
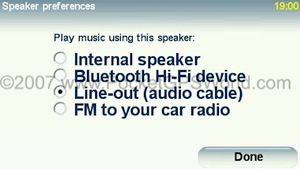
There are additional options in respect of audio out. You can route audio via the internal speaker (default), via Bluetooth to a device equipped to receive Bluetooth HiFi device or via the line-out socket, useful if your car stereo has a line-in facility.
Map Coverage
The latest TeleAtlas mapping has building outlines in certain urban areas, an example is central London with Victoria shown below:
Pseudo 3D Building Outlines (Traffic is Downloading Data)
The 920 has map coverage of the following countries and territories using TeleAtlas data:
Western Europe: Andorra, Austria, Belgium, Denmark, Finland, France, Germany, Great Britain, Italy, Liechtenstein, Luxembourg, Monaco, Norway, Portugal, Republic of Ireland, San Marino, Spain (inc Canary Islands), Sweden, Switzerland, The Netherlands and Vatican City.
Eastern Europe: Croatia, Czech Republic, Estonia, Hungary, Latvia, Lithuania, Poland, Slovakia, Slovenia and the Russian Federation (to 62 degrees East).
Road connector coverage of major roads in Eastern Europe: To allow navigation city to city and around the borders of neighbouring countries in Albania, Belarus, Bosnia-Herzegovina, Bulgaria, Macedonia, Moldova, Montenegro, Romania, Serbia and Ukraine.
North America: Detailed coverage of the USA, Canada and Guam.
Screen-Shots
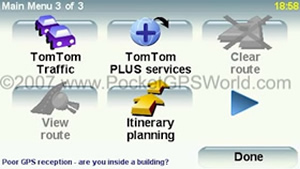
Main Menu Screens
 Map display 2D North Up Map display 2D North Up
|
|
 Map Display 2D Track Up Map Display 2D Track Up
|
| |
|
|
 Night View Display (Colours are Customisable)
 |
Browse Map Screen
(PocketGPSWorld Safety Camera Database)
|
|
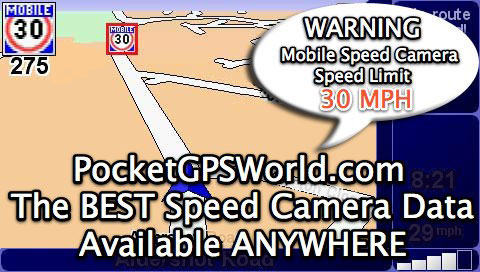
Mobile Speed Camera Warning
(PocketGPSWorld Safety Camera Database, GerryC Icon set)
|
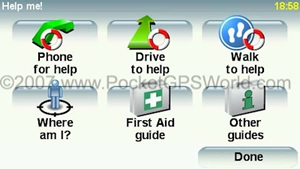
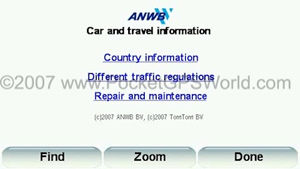
HelpMe Menu
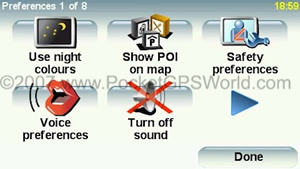
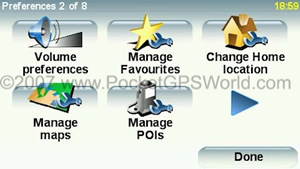
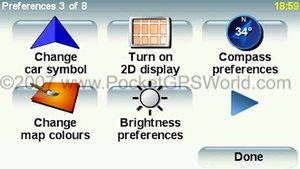
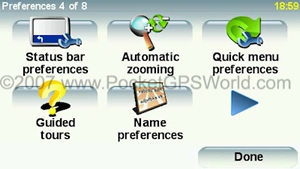
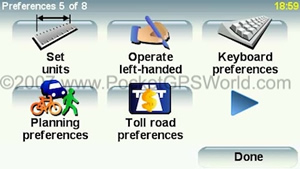
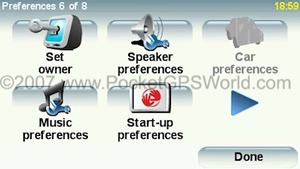
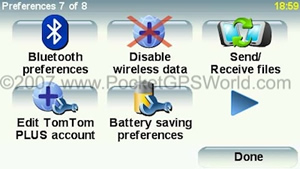
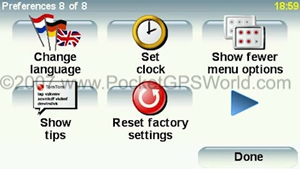
Preferences Menu Screens
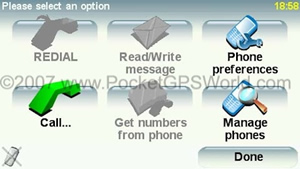
Hands-Free Mobile Phone Menu

Custom Car Symbols
(Click here to Visit our Custom Cursor Download Pages)
Speaker Preferences

Status Bar Options
|
|
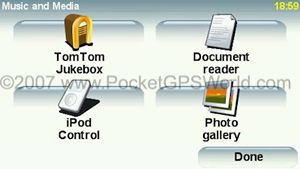 Music and Media Menu
 |
 Shutdown Image (Anti-Theft Reminder)
 |
|
 Low Battery Warning
 |
Technical Specification
| CPU: |
400MHz, 64Mb RAM |
| Screen: |
4.3" |
| Memory: |
4Gb Internal Flash RAM |
| Battery: |
Internal Rechargeable Li-Ion - 5hr Battery Life |
| Memory Card: |
SD Slot, no memory card supplied |
| GPS Receiver: |
Integrated SiRFStarIII 20 Channel Receiver |
| Sound: |
High Quality Speaker |
| Power Supply : |
5v (12v - 5v Charger Supplied) |
| PC Connection: |
Via mini-USB cable (supplied) |
| Dimensions: |
118mm x 83mm x 24mm |
| Weight: |
220g |
Conclusion
The GO 920 rightly earns its flagship status amongst TomTom's PND device range. It looks like a quality item, performs superbly and is so easy to operate that you can give it to anyone and they can use it happily with only the briefest of introduction.
If you are in the market for a device that has European AND US/Canada map coverage I would have no hesitation in recommending this device. Indeed if you are considering any of the x20 models, then the 920T makes economic sense as there is only a small premium over its lesser stable mates and the addition of the addition maps and remote more than make up for this extra cost.
Pros
- Although I haven't been able to thoroughly test EPT it has been observed working on a few occasions in multi-story car parks etc and does the job
- Slim form factor
- Great Screen
- Loud Speaker
- TomTom's simple menu structure is easy to navigate
- Bluetooth Remote works well
Cons
- Basic mount may not appeal to all (however there are excellent 3rd party solutions, see 'related articles' links below)
- RDS TMC still has major gaps in coverage in the UK and the data is often inaccurate
- Bluetooth Remote takes a few seconds to respond the first time it is used on each journey
- Map Share isn't all it could have been
- TomTom HOME is still clunky and unreliable
|