Introduction
We already reviewed a Seidio G2500 back in July 2004 however, Seidio offer the G2500 for a variety of PDA's (HP iPAQ 19xx, 22xx,
38xx/39xx, 41xx, 43xx, 54xx/55xx; Dell Axim X3, X5; Garmin iQue 36; Palm Tungsten
T; Toshiba; Treo; XDA II). This review looks at the iPAQ 38xx/39xx variation,
in the dark grey colouring (a silver colouring is available, too) and the technology behind the mount.

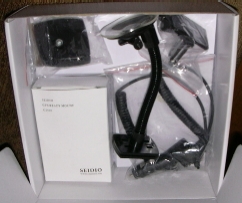
In the Box
The picture above shows the package contents – the G2500, three mounting
options, and the 12V cigarette lighter adapter as well as two brochures that explain the mounting options and the general functionality of the G2500 in good detail.
The mounts
The set includes three different mounts:-
- the well known suction mount with
the lever to improve suction
- a swiveling mount that can be screwed on (who
would ever do that to his car ?)
- and a vent mount that actually works!

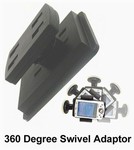

All the vent mounts that I tried before did just fall out of the vent again
at the slightest acceleration. This one has two fixing (locking) brackets that hold the
mount very firmly in place. Finally! It's even quite tough to get the mount
off again (you have to squeeze the holders to slide the brackets back), but
this time that's a good thing.
The Cigarette Lighter Adapter/Accessory Power Chord

I'd like to explore things, so I had a peek inside the adapter. It really
is a straight through connector 12V to 12 V – this means you can also hard
wire the mount directly into the car power supply. But don't ever try to connect your PDA to it!
A walk around the G2500
Let's have a look around the G2500 and discuss the constructive details.
The Top
The top of the mount shows the speaker input (2.5 mm socket) and the GPS connector.

This is a standard RJ11 - like my TomTom serial receiver has. So
I plugged the TomTom GPS in, and sure enough it started to work. Cool.
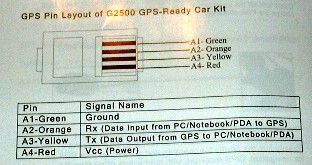
The manual describes the pin layout of the serial receiver. So you can also
craft your own connector if your serial GPS doesn't come with an RJ11 connector
already.
The GPS connector goes straight up to the top - something you will have
to consider when planning the cable paths. Have a look at the "in operation"
pictures to see what I mean.
The right side

The right side has the straight power in (12V) and the DC out (5V) to charge
or give power to Bluetooth receivers. Unfortunately both connectors are of
the same size, so you risk frying the mount when plugging power into the DC/OUT connector – be careful!
The power connector has an angled design, making cable management easier
and contributing to a tidier look.
No cable has been added for the powering of BT receivers. Nowadays most
of them have an iPAQ style connector, so you will have to craft a cable with
two plugs, one iPAQ size and on a size smaller to fit into the G2500. As always,
the positive stuff is on the inside (I meant the polarity, actually.)
The left side
The left side has the speaker volume control and two holes that are covered
by some rubber knobs. Mysterious, mysterious… They probably have a function
for other PDA's.
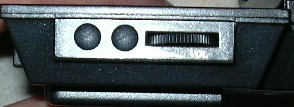
Keep the speaker volume control location in mind when you select a mounting
place – you'll need to be able to access the left side of the G2500.
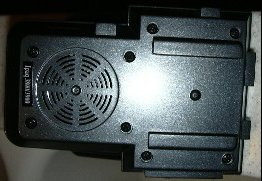 The back
The back side of the G2500 with the speaker. I was not too impressed with
this solution. I selected the vent mount option with the result that the speaker
talks to the vent rather than talking to me. Add some air condition noise and
the poor speaker will suffer from permanent inferiority syndrome.
Above the speaker you see the rails where the mount will slide in from below.
I found them to be very sturdy and tough to fit – very good when it comes to
security and prevention of flying objects.
The bottom
The LED at the bottom of the mount indicates if power is applied to the
mount. It would have been nice if it would also show the GPS data flow, or
even the fix status.

There is plenty of room on the bottom front of the G2500, so I would have
thought placing the speaker in the front and doing some acoustics work with
the lower body of the G2500 would have resulted in a much better audio result.
The connector
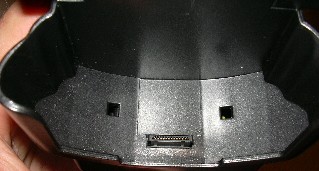
This is where your PDA slides in. Here you see the lower part for iPAQ 38xx/39xx.
The two rectangular holes are where the insert snaps in.

And here is the lower part with the plastic insert shown so that a naked
iPAQ can be fitted into the mount
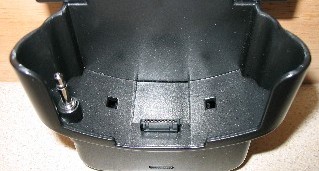
Here again a lower part, but this time for the iPAQ 5xxx series (thanks
to forum user Peter Rusling for the picture). Note that this setup doesn't
require the additional audio bridge cable since the (monaural) audio connector
is already located at the bottom for these models (funny how a constructive
mishap on the iPAQ can be turned into a benefit…)
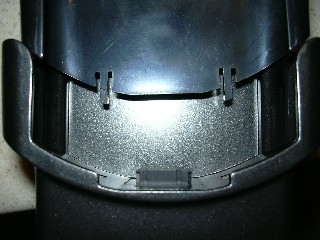 The insert
As shown before the mount fits the naked iPAQ when you use the provided
insert, as well as iPAQ's with jackets when you remove the insert. But before
you get too excited – the mount is only deep enough to hold a naked jacket,
a silver slider CF jacket, or – at most – a GSM/GPRS jacket.
None of the jackets
that have their own battery (PC Card or double PC Card) fit, and neither do
the GPS jackets.
I really do not understand why the G2500 could not be made
a little deeper to hold a bigger variety of iPAQ/jacket combinations.
The inside story
Did I mention already that I like to take things apart? Anyhow, here's a
photo of the inside of the G2500. (do NOT try this at home or your warranty
will be void)
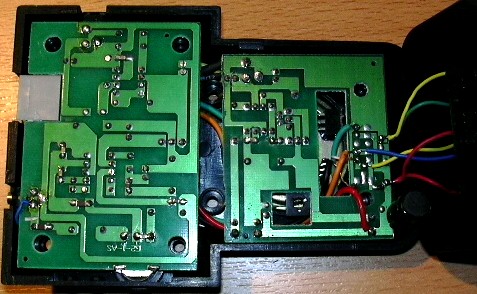
The inside of the mount reveals the modular design. The bottom part (right)
can be exchanged according to the PDA that needs to fit in. The middle part
holds the power converter, and the top part does the voice amplification.
The circuitry looks a tad, uhm, dated. But it does the job.
In operation
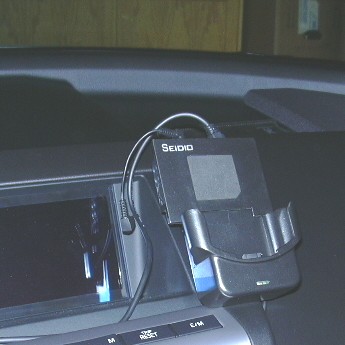
Here you see the mount fitted to one of the vents in my car (I had to select
the right vent because the left vent mounting would have blocked access to
the volume control).
Note the GPS cable coming out at the top and the audio
bridge cable dangling around waiting for the iPAQ.
The 12v power connector
is on the right side, the cable barely visible. Generally there are plenty
of options to make the cables disappear, and to end up with a very tidy setup.
Also worth mentioning is the rubber patch just under the Seidio logo - that
will help to hold the PDA in the upper part. Nice detail.
Here you see the iPAQ fitted in (together with the GSM/GPRS jacket). It
is very convenient to drop the iPAQ in and pull it out. No need to fit additional
cables. And yes, the PDA also gets charged while it's in the cradle.
There is this audio bridge cable from the 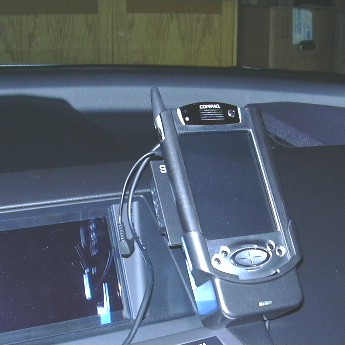 iPAQ headset output to the G2500's
speaker input. But as I said I found the speaker on the iPAQ 3970 to be much
better than the speaker on the G2500.
According to forum user Peter Rusling (who provided me with the picture
for the 5xxx variety of the mount) it is a different story for the Pocket PCs
with a weaker internal speaker or with speakers that are already on the back
of the device. There the G2500 speaker may make more sense.
Pro:
- Very convenient setup when you have a stationary GPS receiver and need/want to take your PDA with you when you leave the car
- Colour choice is matching most car dashboards
- Plenty of mounting options, excellent vent mount
- Many Pocket PCs supported with more to come
Con:
- Speaker is not better than the one on the 3970 iPAQ (may be different for other Pocket PCs); speaker is located at back of unit
- Power connectors can be confused which can potentially damage the G2500
- Does not accept iPAQ's with jacket based GPS receivers or standard jackets.
Conclusion
The G2500 is a convenient solution for fitting PDA's. into your car. It offers
a variety of secure mounting solutions, making sure the PDA doesn't fly around
in your car.
The G2500 is ideal for serial GPS receivers thanks to its pass through connector,
but it will be equally convenient for most other types of GPS receivers like
BlueTooth, CF, or SD. It is fitted into the car quickly, providing an instant
overall improvement in the way you use your PDA navigation system.