 Review by Dave Burrows Review by Dave Burrows
Introduction
We announced on 13th September 2004 that Navman have three new products coming out and we have now production iCN 650 in our hands.
This review covers the iCN 650 which is an enhancement over the iCN 630 V2 and the original iCN 630 in a number of ways. First like its new brother the iCN635 it incorporates the new 2004 V3 software. This includes a number of new features like Topographical maps as one. The iCN 650 also has another bonus in that it has complete Western European maps pre-loaded. Unlike the iCN635 which comes with a 128mb SD card, there is an SD card slot available on the iCN 650 but it's filled with a 'bung'. The reason for this is because the iCN 650 incorporates a 2gb hard disk within the casing which allows for full European maps to be loaded on the device rather than having to keep connecting it up to your PC and transferring the maps from CD.
The other thing you will notice is that Navman's prices have dropped. Originally when the iCN 630 came out you were looking at paying £999 and that was without a storage card. Over time prices dropped, the iCN 630 V2 price dropped to around £790 and the new iCN 650's SRP is £799. So you're not only getting more in terms of software and updated maps, but a pre-installed 2gb hard disk with Western European Maps Pre-loaded, and a remote control! This has to be a good bonus over the previous versions.
When Navman introduced V2 they switched from NAVTEQ maps to TeleAtlas, and I know a fair amount of Navman users had objection to this as they found that address searching was less reliable. This has improved over time though and the TeleAtlas maps are getting better and Navman have patched workarounds for some places not listed correctly in the TeleAtlas database. So unfortunately for those that would prefer NAVTEQ maps, you are out of luck.
Something that has also changed is the name of the software. Historically it's been called SmartST Pro on the Pocket PC, but recently dropped the PRO from it's name. The iCN range has historically been called SmartMAP but this has also recently changed to come back to a core product called "SmartST" (Smart Street).
What's in the box ?
Storage Space
As I mentioned earlier, there is an SD slot, but it's currently filled with a rubber 'bung'. The 2Gb hard disk is integral and cannot be removed or upgraded by an end user, so 2Gb is the limit, but it currently holds all of the Western European maps, so there shouldn't be an issue here, and I'm told there's space available to load other maps.
Antenna
The iCN 650 comes with a built in antenna (the same which was seen in the iCN 630 and iCN 630 V2). The antenna is multi directional and will increase the level of signal. It also comes with an MCX connector allowing you to plug in an external active antenna if you feel you require it.

The integrated GPS patch antenna is good enough to not only obtain but hold a sat signal, and I have never experienced any problems on the iCN 630, iCN 630 V2 and iCN 650's antenna. The only issue you may have is if you have an Athermic coated windscreen (UV Coated), in which case purchasing a Navman external patch antenna and plugging it into the socket supplied on the side of the flip-up antenna should allow you to get a better signal. You can place the external cabled patch antenna onto the roof of the car or near to the "blind spot" where there is no coating.
 
Speaker
One thing I have always liked about the iCN 600 range is that the integrated speaker is loud, crisp and clear and won't be drowned out by engine noise or road noise.
Some concern for some people maybe that the speaker is positioned on the back of the iCN 650 so it is sending the sound outward towards the windscreen and not towards you, however the speaker is extremely loud, and you will not experience any problem here. At any time you can adjust the volume of the iCN 650 by using the keypad.
 Keypad Keypad
The keypad on the Navman iCN 650 is identical to the keypad found on the iCN 630, iCN 630 V2 and iCN635.
The keypad itself is fairly responsive, although it does feel a little spongy sometimes when operating the center cursor pad, however when you press a button it responds which is what it is meant to do.
One thing that has differed is that to the right of the central cursor pad is the infrared eye. You may recall if you are already familiar with the iCN range, or have read the previous reviews of the Navman iCN 630 and iCN 630 V2 that the infrared port was there but was not operational. I can now confirm that there is no physical infrared technology behind the window to interface with the processor to enable an infrared remote control on the earlier iCN 630 and iCN 630 V2 models.
However, the new iCN 650, iCN510 and iCN635 now offer true Infrared support!
Screen Quality
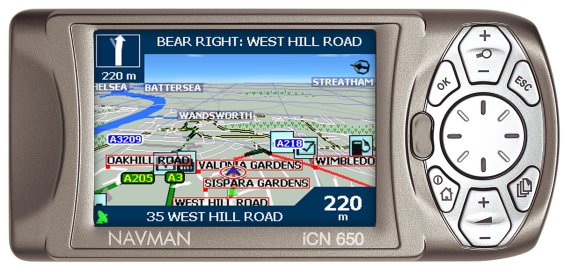
One of the good selling points on the iCN 650 is the bright vibrant screen. The only other company to have one like this is Garmin. Garmin have introduced a touch screen into their Street Pilot 2600 range. Navman felt that this would degrade the screen quality in contrast and brightness and decided against this.
The screen quality on the iCN 650 is outstanding just like it's predecessors. The colours are rich and the contrast strong. The screen sports a 3.8" TFT QVGA screen for use in-car with anti-reflective coating. The screen dimensions are 320x240 pixels with more than 230,000 colours.
 Remote Control Remote Control
The remote control is a new feature introduced primarily for the Navman iCN635 and iCN 650. This is an InfraRed remote control and works quite nicely with all the key buttons in easy to reach areas on the remote which make it ideal for when you are driving (although you shouldn't operate this whilst driving).
Suction Cup Strength
The suction cup strength is very strong, you can even hang onto the iCN 650 whilst it's suctioned to the windscreen and pull it in all directions and adjust the direction it's facing. I noticed depending on where the suction cup is placed on the curvature of the windscreen that sometimes it won't receive full suction and will drop off, but this is downside with all suction mounts not just the Navman one, and does require you find a very flat area of the windscreen with no curvature. This usually works well putting the iCN 650 higher up on the windscreen rather than lower down as this is where the curvature tends to occur more.
Time To First Fix and Satellite Information
TTFF's (Time To First Fix) averages around 50-60 seconds which is around par for a GPS Receiver. Sometimes you may experience faster or slower fixes depending on your surroundings, depending on when the iCN 650 was used with satellite coverage last, or depending on whether you have an Athermic coated windscreen.
Maps
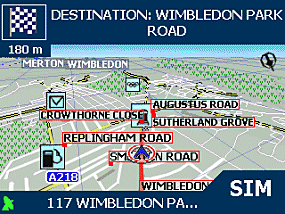
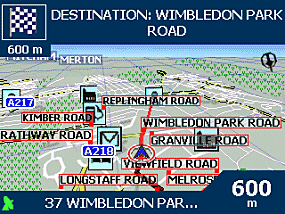
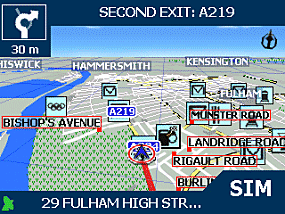
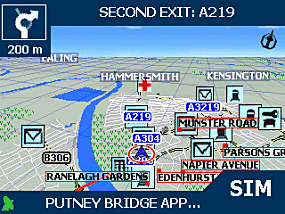
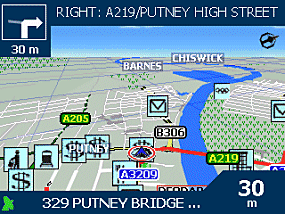
As with the iCN 630 V2 you can pan the map and also change the elevation view from 2D to 3D by using the up/down cursor pad. When Navman say they have Topographical maps, it's not true topographical like you would see with elevation data where the maps are in true 3D with hills looking like hills.
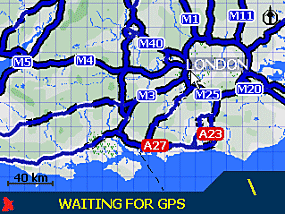 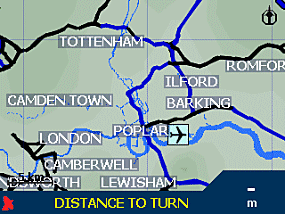
Instead the new software basically colours the map regions better and indicates where features may be under heavy tree growth like in forests, parks etc, and also gives you lat/long grid lines on the map. You will also notice a much better horizon line with sky compared to the older version.
Next Turn Screens
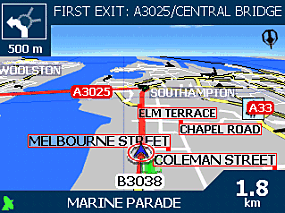
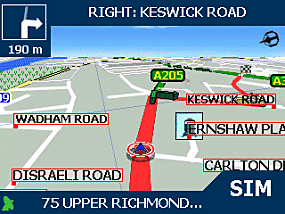
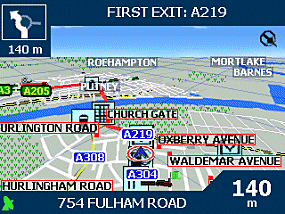
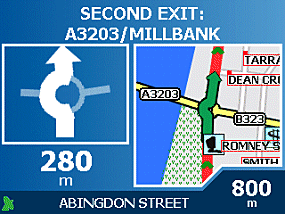
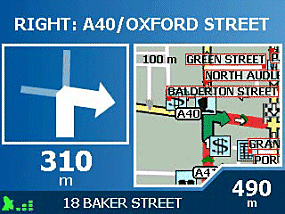
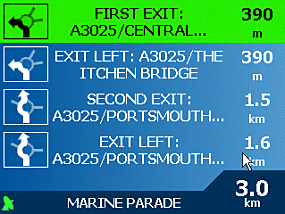
You will see the Next Turn screens much better now which are accessible from pressing the page button. This not only gives you the correct turn from the roundabout or junction to take (whereas before it was a generic icon), but it also shows you the turn on the map and will show your pointer when you approach it. This makes navigating some junctions a lot easier. If in doubt, hit the page button!
Routing Options
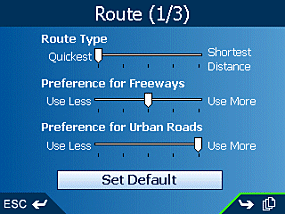
Routing Options is something that Navman have dramatically improved with V3 software. You now have the ability to not only select the Quickest or Shortest route, but it is provided on a sliding scale, so if you want something slightly in-between then you can adjust the slider to the position you feel more comfortable with. Navman have also made the sliding scale available for Freeway/Motorway and also Urban Roads, so you can truly customise your routing options here and make sure that you are routed by the preference you prefer.
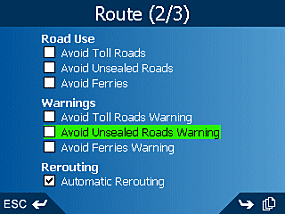
You also have the ability to Avoid Toll Roads, Avoid Unsealed Roads and Avoid Ferries which are new features that also augment the routing algorithms, and you can toggle on and off the warnings for each of these, and select whether you want to be automatically re-routed
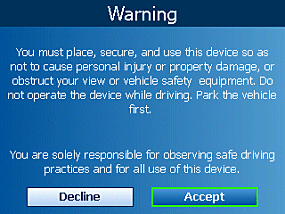
Warning and Language
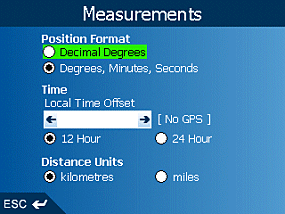
Nothing really to mention here apart from you can select from a large selection of languages and that you should not be using the cursor pad whilst driving!
Routing Algorithm
 I have found that having the routing option set up as the default in the screen to the right, e.g. bias complete towards Quickest, Preferences for Freeways set at mid-point and Preference for Urban Roads set at Use More, this seems to give the most accurate journey for the types of journeys I have been driving. I have found that having the routing option set up as the default in the screen to the right, e.g. bias complete towards Quickest, Preferences for Freeways set at mid-point and Preference for Urban Roads set at Use More, this seems to give the most accurate journey for the types of journeys I have been driving.
The best thing to do is to try each setting for a few days or maybe a week and see what you think is better for the roads you prefer to travel on.
Also try driving different roads, to different destinations, do not just solely rely on your trip from home to the office each day as this may be good when set to one setting but may not be good when you set it to a different setting.
Trip Planner
Navman have now implemented a Trip Planner screen where you can add up to 14 destinations. It sorts them in the order you have added them, so if you want to optimise the route you will need to do this  manually yourself. There is also a facility to MOVE the address and to manually sort them by tapping and holding an address in the Trip Planner screen and then selecting MOVE, then use the cursor pad to move the address up or down. manually yourself. There is also a facility to MOVE the address and to manually sort them by tapping and holding an address in the Trip Planner screen and then selecting MOVE, then use the cursor pad to move the address up or down.
Display Settings
You have the ability to set the display to auto-zoom when close to a junction, to Display Next Turn Screen and also to Display Next 4 Turns Screen. You can also change the Map Colour Scheme from Desert to Ocean, Snow, Salmon, and High Contrast as well as set the map colours from Day to Night and to turn on/off the Topographical Display. Navman have also given you the ability to turn the Map Grid Display on/off, the Compass on/off and No Entry Roads on/off.
POI's
You have the selection of showing POI's on the Map screen or to not show these. Categories include:- Accommodation, Amenities, Automotive Facilities, Buildings and Monuments, Entertainment, Financial Services, Food and Drink, Institutions, Medical Services, Natural Attractions, Shopping, Sports Facilities, Tourist Attractions and Transport.
Active POI's
Active POI allows you to import CSV files with details like Lat/Long and Name into the iCN 650 and this will allow you to add-on new custom POI's from PocketGPSWorld.com and also our Safety Camera Database. Unfortunately we didn't have the software available in the beta version to import this, so could not test it's functionality or accuracy. You can also set speed reminders in telling you if you are over the speed limit and also Warn driver when operating plus Warn when GPS lost.
Comparing the iCN 650 Size
Below you will see a size comparison of the iCN 650 and the iCN 510.


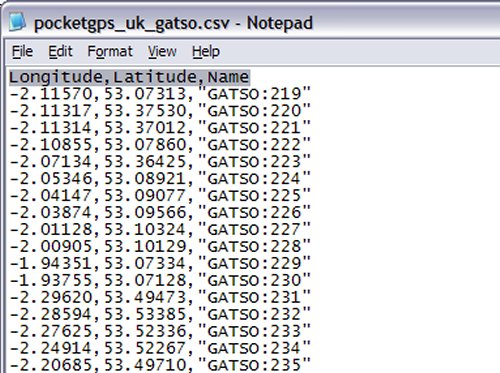
Adding Speed Cameras (Safety Cameras) and other Points Of Interest databases is fairly easy to install to a Navman iCN 650. You need first to have the POI file in a CSV format with no header (to the columns) and Long/Lat and the Name (in quotes). Once you have this, you are good to go.
We have thousands of POI's available on our POI-Sync service and also on the TomTom GO POI page. You can convert any of these by downloading them, using the TomTom utility called DUMPOV2 and once converted to a text or comma delimited CSV file, make sure quotes are around the names description (third column) and you should be good to go with importing into your Navman iCN 650.
Downloading the Pocket GPS Safety Camera Database
1. Download from Pocket GPS Safety Camera Database page
Extracting the Database on the PC
1. Extract the ZIP file contents to a directory on your PC, e.g. C:\temp
Preparing the database to work with Navman's software
1. Open the relevant CSV file you want to transfer, e.g. C:\temp\POCKETGPS_UK_GATSO.CSV in NOTEPAD or any text editor.
2. Delete the first line to remove the Latitude and Longitude information, so the first line reads the data (no space)
3. Save the file (FILE | SAVE)
Installing Pocket GPS Safety Camera Database
1. Run Navman SmartST Desktop on your PC.
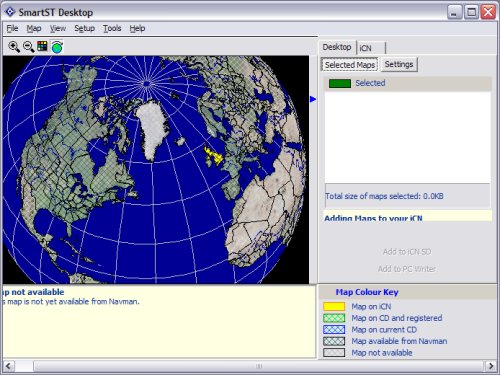
2. Click MAP | POI's to open the POI Editor.

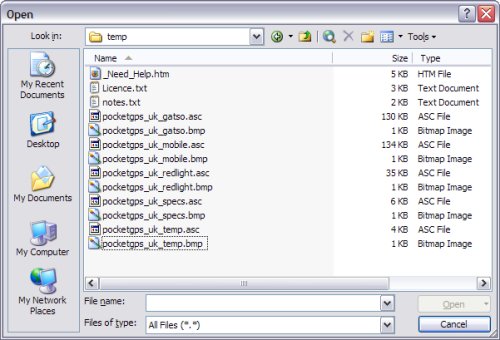
3. Click FILE | OPEN and point to your edited CSV file, e.g. C:\Temp\POCKETGPS_UK_GATSO.CSV
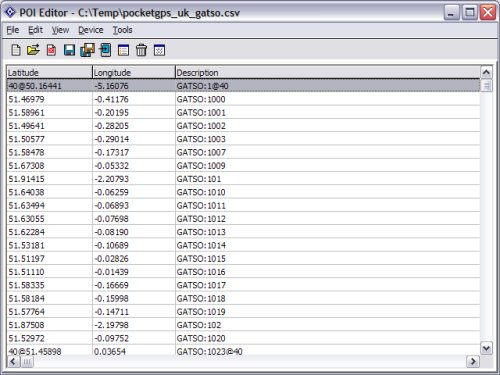
4. You should now see the Speed Camera data in a screen below.
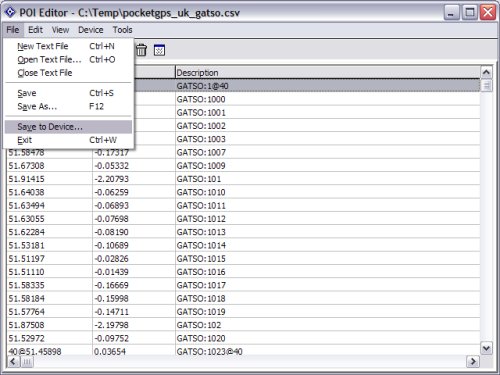
5. Click FILE | SAVE TO DEVICE
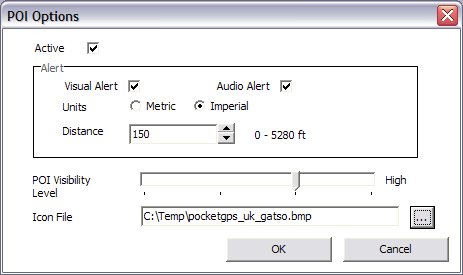
6. Now tick ACTIVE, VISUAL ALERT, IMPERIAL, 150, Increase the POI Visibility and also point to the BMP file you extracted earlier from the ZIP file, e.g. C:\Temp\pocketgps_uk_gatso.bmp
7. Now enter a name to appear within the Navman software.
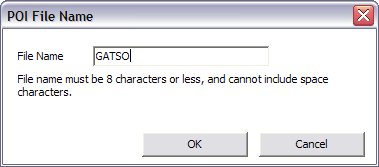
This should have now downloaded the data to your iCN and you should now see it in there and be notified of the latest Speed Cameras.
|