Overview
As I briefly explained above, the primary new feature that the 9000 brings to the marketplace is the built-in GSM/GPRS module. The 9000 is supplied pre-configured with an internal Orange SIM card and an active data connection. This service is provided as part of the subscription package* which you are required to use if you wish to take advantage of the safety camera warnings and other features.
The beauty of this system is the simplicity it brings to database updating. No longer do you need to connect your device to a PC to download and install an update. Instead they are delivered to you OTA without any interaction from you save of course having the unit switched on! In addition you get access to Traffic Updates and Weather information, all seamlessly delivered to your device without the need to connect an external antenna as some other solutions require or having to pair a Bluetooth telephone.
An additional service is the Tracking feature** which allows you access to the Road Angel Tracking Portal. From here you can track their own Navigation unit at 2 minute intervals and also to send destination instructions from their Tracking Portal or via SMS.
* Subscription charge of £5.99 per month by Direct Debit, a minimum 12 month contract is required.
**Access to the Tracking Portal is £4.00 per month.
What Do You Get
Open the box and you will find the following:
- Road Angel 9000 with UK Mapping on SD Card
- Windscreen Mount
- 12v Cigarette Lighter Power Cable
- Mains Power Cable
- PC USB Cable
In Use
The 9000 unit is simply designed and rather boxy when compared to other devices currently available. Indeed one comment that was passed was that it bore more resemblance to an early prototype than a finished product. On the top of the unit is the Power ON/Off Button and on the bottom is a small reset button.
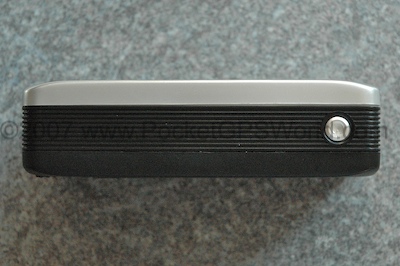
Top View
On the rear is the battery cover with lock switch, above that is the windscreen mount interface connector and to the right of this is the speaker. You can also make out the stowed stylus on the left.
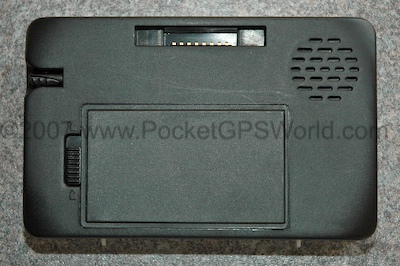
Rear View
On the left hand side is the SD Card slot which contains the pre-loaded mapping card. The stylus can be found on the left hand side along with an external antenna connector concealed by a small cover, a 3.5mm earphone jack and a mini-USB port for charging and PC connectivity.
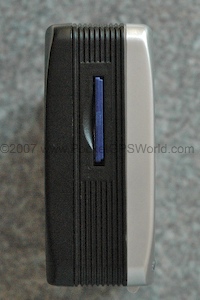 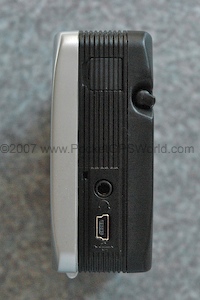
Left and Right Side Views
The 9000 comes complete with an active windscreen mount. This has an adjustable 'foot' and is secured to the windscreen itself using a suction cup and locking lever. The mount can be further adjusted by a ball and socket arrangement which is clamped in the desired position by a knurled locking ring.
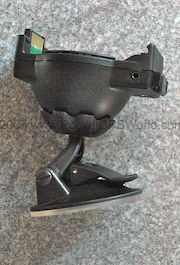 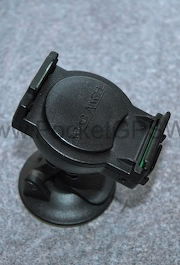
The supplied mini-USB charge/power can be plugged into the unit directly or into the mount. When the 9000 is connected it draws power from the mount if it is connected to the 12v supply. The mount also which also contains a speaker which is used in preference to the speaker contained in the 9000 itself when connected to the mount. There is another smaller jack on the side for the optional laser detector accessory.
On the base of the mount is the mount release button.
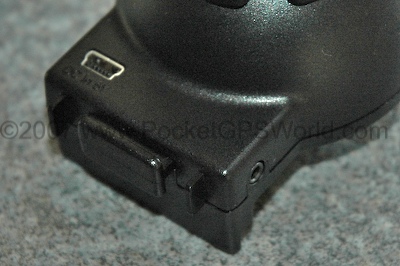
Rear of Windscreen Mount
The 9000 is easily connected to the mount. This may seem a trivial comment but many devices some with poorly considered mount solutions that are either fiddly to attach to the screen or are difficult to mate with the navigation device.
In the case of the 9000 it is simply placed onto the bottom 'lip' of the mount which mates with a matching notch in the 9000 and then pushed back until it clicks into the mount securely.
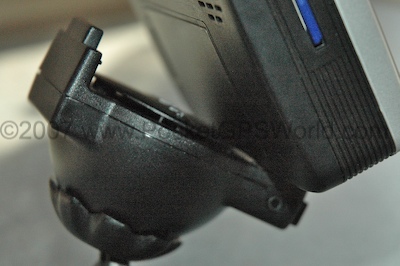
Attaching 9000 to its mount
To release the 9000 you simply press the release button on the base of the mount and tilt the unit forward in a reversal of the installation procedure. The only problem with this is that as with many devices it is advisable to rest the base of the mount on the dashboard to prevent the screen shaking when in motion. The 9000 being heavier and bulkier than its contemporaries suffers badly from this if not positioned such that its base rest on the dash. However, in this position the button becomes inaccessible.
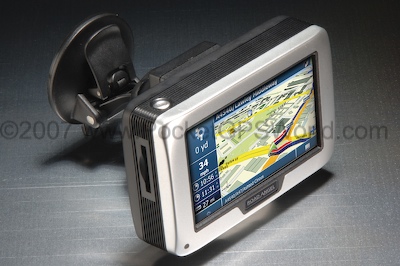
Attached to mount
As always with a new device on test the first thing we do is connect it to power and switch on for a first fix test. The 9000 has a SiRFStarIII Chipset and so should perform well. The initial fix fresh out of the box took a few minutes which is not uncommon. However during subsequent warm start tests in which we would expect a device to achieve a fix within 30 seconds we were surprised to find the unit often took nearer a minute to acquire a satellite lock.
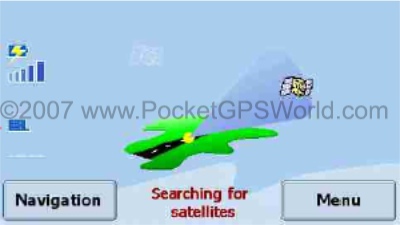
Satellite Status Screen
The 9000 was also far less sensitive than we have come to expect of a SirFStarIII equipped device. In difficult signal conditions it would lose signal earlier than other devices we were using as comparison units and would again be the last to reacquire once good conditions were available.
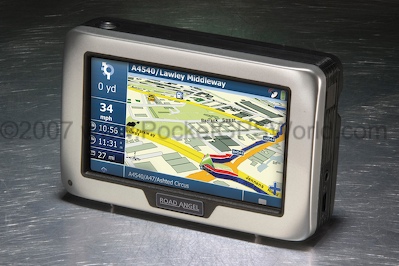
Although not the most svelte of units the device has a substantial feel and from the front looks fairly good with the silver screen bezel lending it an air of quality.
The menu structure is broken up into five distinct areas, Navigation, Device, Media, Remote and Road Angel.
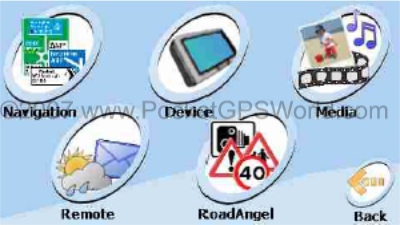
- Navigation
As you would expect, this takes you to the navigation specific menu area
- Device
This provides access to your current coordinates, device serial number, firmware and other inform nation as well as screens settings such as back light, calibration etc
- Media
From here you can play .MP3 files, Pictures or Movies stored on an SD Card.
- Remote
Here you can check the weather forecast or read received SMS Text Messages
- Road Angel
here you can configure the Road Angel specific alert setting such as type of alerts, audio settings, distances etc
In addition to using the 9000 as a navigation unit with overlayed safety camera information, you can if you choose have the device operate in Road Angel mode where you get full screen alerts in place of the map display.
The screen shot below shows the Road Angel display and explains the information available:
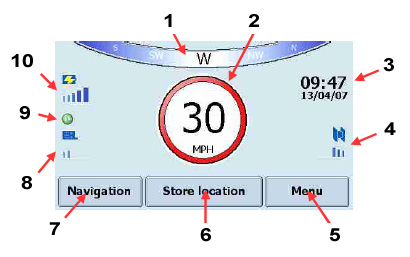
- Heading Indicator
- Current Speed
- Time and Date
- Satellite Signal Status
- Menu Button
- Store Location Button (to add current location to camera database)
- Switch to Navigation mode
- GSM Signal Coverage
- Update Status (available for updates)
- Battery Status
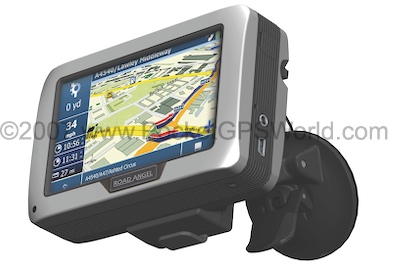
In use the navigation side of the device is simple but rather basic in operation. The 9000 uses PostCodes to simplify address input. Locating a destination address is easily achieved and once you have input a destination you can choose to enter a 'Via' if you wish. From here the route is then calculated with an on-screen progress bar.
The map display has little scope for customisation, aside from selecting Day/Night mode, choosing 3D or 2D and map Up or Direction Up. You cannot choose what on screen information you wish displayed and are stuck with the defaults.
The maps themselves are crisp and clear with the current position easily discerned and upcoming turns clearly portrayed. The display shows both the name of the road you are on and the name of the next road you will be using, handy as the the voice prompts are not text to speech. Pseudo 3D mapping is available in some urban areas but this is not full 3d, merely a representation of building layouts.
Other in route options are the ability to select an alternate route to avoid the next 0.5, 1 or 3 miles of the set route which may be useful if you come across a diversion etc.
Because the 9000 uses GPRS to access TMC Traffic there is much less issue with signal availability than there is with a device that relies upon FM Reception but the information is still as poor as ever although this is not Road Angel's fault. On a recent journey I had the pleasure os sitting in a jam on the M27 caused by a traffic accident with no mention on the device, it did however show heavy traffic on the other carriageway which came as some surprise as it was flowing freely!
Although the initial menu is self explanatory many of the other settings and configuration pages are not. Many settings are difficult to locate and it is clear that this is a system modified by Road Angel to add their safety camera warnings. As an example I wanted to check when the safety camera database had last been updated. Given the unique feature of this device is the OTA updates I had thought that it would be simple to verify that the database was up to date. The obvious place to find this information would be in the Road Angel Menu area or better still on the Road Angel main display but no, it is in fact to be found on the device information screen and even then is listed as 'Last updated: date' rather than database updated: date.
I also found that many of the test routes we use came up with surprising results on the 9000. It often calculated routes that went through towns were bypasses had long since been built and on a number of occasions chose to route me off a major A Road or M-Way up a slip road and then over a roundabout only to rejoin the original route. I would normally blame old map data for such issues but the 9000 uses the latest available TeleAtlas map data and units from other manufacturers using the same data did not suffer such issues.
On a positive note, the 9000 came very close the manufacturers claimed 4h battery life which is excellent for a unit that also has to power a GSM/GPRS chip.
Sample Screens
|
|
|
Most of the 9000's features are accessed from the Main Menu Screen above. Here the 'Destination' button has been selected, this changes the four context sensitive options on the right.
As can be seen, you can navigate to an Address, a POI, browse the Map to select a destination or choose an address that has been used recently.
|
|
Above can be seen the Map Browse Display. From here you can scroll the map, zoom In/Out etc to locate and select a destination. |
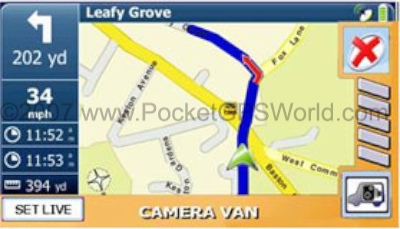
Orange - Mobile Safety Camera
|
|
|
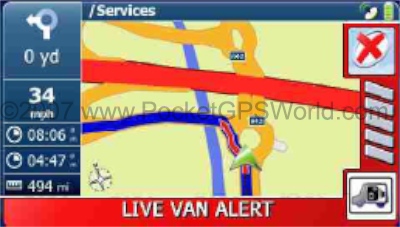 Red - Live Van Alert
 |
|
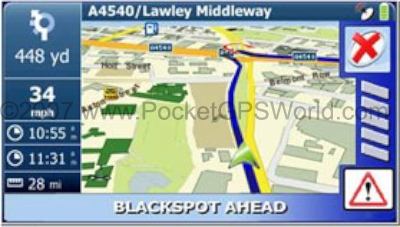 Blue - Blackspot Alert
 |
The screen shots above demonstrates another of the unique features of the 9000. Although you will by default get warnings as you approach the area of a known Mobile Safety Camera site regardless of whether it is active or not, if you see a van operating at the location you can press the 'SET LIVE' button. This marks the site as active for the next two hours and this information is transmitted to all other 9000 users who will then receive the 'Live Van Alert'.
|
|
Above is the Blackspot warning, this indicates you are approaching an accident black spot, congestion zone or primary school zone. |
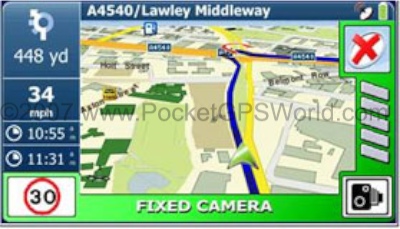 Green - Fixed Safety Camera
 |
|
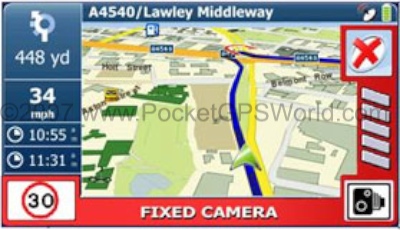 Red - Fixed Safety Camera (Over speed)
 |
| If you are approaching a fixed, temporary or average speed camera location and travelling
below the advisory speed limit, the alert message is shown on a green background. |
|
If you
are travelling above the advisory limit the background is red. If your speed subsequently
drops below the advisory speed limit, the background reverts to green.
|
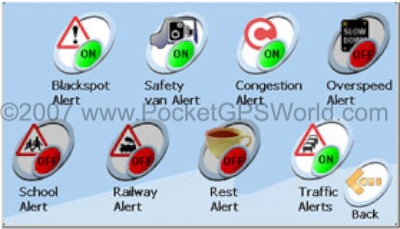 Alerts Configuration Page
|
|
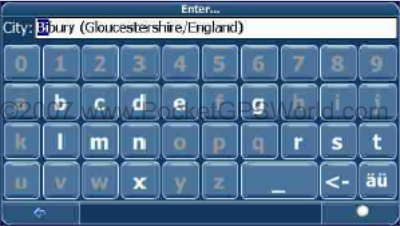 Address Entry
 |
|
|
The 9000 has a nice feature when entering addresses. As you type, the possible matches for any given address are highlighted. |
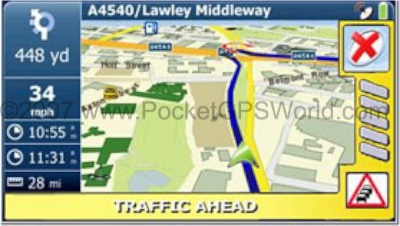 Yellow - Traffic Alert
 |
|
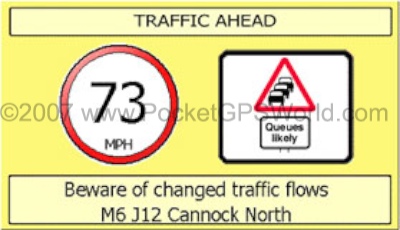 Yellow - Traffic Alert (Full Screen Mode)
 |
Traffic Alert in Map Mode
|
|
Traffic Alert in Full Screen Alert Mode |
Resources
Road Angel User Manual |