|
Nav N GO iGO 8 Europe Review |
17th June 2008 |
|
Review by Matthew Morley (MaFt)
Introduction | Installation | Set Up | Managing POIs and User Data | Finding A Destination
Navigation | Speed Cameras | Other Comments | Round Up | Conclusion | References & Links
 Introduction
Since I first saw iGO 8 Europe (hereafter referred to as iGO 8) in action at CeBIT back in March 2007 I, along with countless others, have been keen to get my hands on the finished product! Already available on numerous devices (MyGuide, Sony PSP's Go!Explore and OnCourse Navigator as well as some smaller companies' devices) the OEM product for PDAs was finally launched at CeBIT in March this year. Sporting impressive 3D landscapes and detailed buildings this is certainly a nice looking piece of software. But, is it all just eye candy? Does it actually add anything to the navigational aid? Is the underlying software actually any good?! Read on to find out more…
Installation
I should point out here that the test device was a T-Mobile MDA Compact III (aka O2 XDA Orbit / HTC Artemis) with a 201Mhz CPU, 64mb RAM and running the official T-Mobile WM6 ROM. The internal GPS receiver was used throughout. I was testing a standard retail version of the software albeit with a VIP license that does not allow for updates and does not include the Content Manager software.
First up you should be warned that iGO 8 is very memory hungry! The test device is listed as compatible yet it doesn't quite meet the minimum spec stated by NavNGo as:
- PDA / Smartphone
- QVGA or VGA touch screen display
- Built-in or connected GPS receiver
- Microsoft® Windows Mobile™ operating system
- 300 MHz processor (400 MHz recommended)
- 64 MB memory (128 MB recommended)
 I was also told by Nav N Go that they recommend at least 28MB free program memory before starting iGO 8 – in practise there was usually between 18MB and 22MB free.
iGO 8 is provided on a 2GB micro-SD (transflash) card with adaptors for both mini-SD and full size SD. It is locked to the card so you cannot move it to a larger capacity card. On some phones this may not be an issue if there is easy access to the SD Card slot but on the test device this involves shutting the phone down, removing the back cover, removing the battery, taking out the SIM and then you can change the card, replace the SIM, battery and back cover and then restart the device… For those devices with easier access, iGO 8 has an 'auto-run' option – when selected the software automatically loads on insertion of the SD card.
Installation was straightforward; Windows automatically detected a new card and, after confirmation, ran the installation program. After a couple of 'yes' clicks and a couple of minutes the software was ready to run along with a rather large and unmissable 'Nav N Go iGO 8' option on the Today screen.
Set Up
On first run it will import your phone contacts and alert you to any addresses it could not match up. This works well and has prompted me to actually start saving addresses to my contacts!
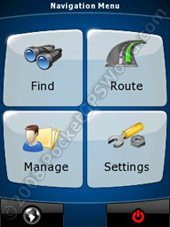
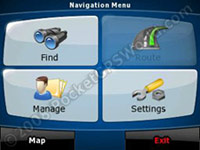
The main menu has 6 options: Find, Route, Manage, Settings, View Map and Turn Off.
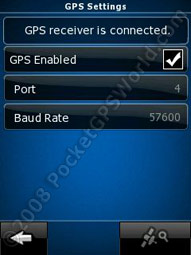 There are a lot of settings and options but the most obvious one you will need is the GPS setting. You can either manually add the COM port and Baud rate or use the auto-detect option by clicking the little satellite/magnifying glass logo in the bottom corner. I do not have a Bluetooth GPS receiver so am unable to comment on Bluetooth set up. You can also set up a compatible TMC receiver in the same way.
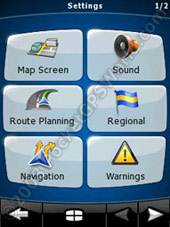
Here is a brief run-down of some of the other settings you can adjust:
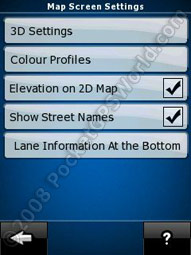
Map Screen
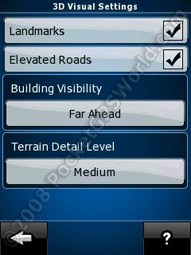
Change the 3D settings (whether to show landmarks and elevated roads and also the level of detail for terrain) and colour profiles (automatic night mode, daytime/night colour profiles – there are 8 day and 6 night colour schemes to choose from). Show elevation on the 2D map and show the street names. Select where the Lane Guide information is shown (bottom, top or off).
Route Planning
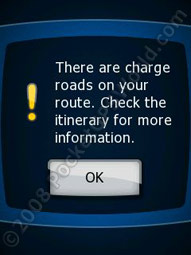
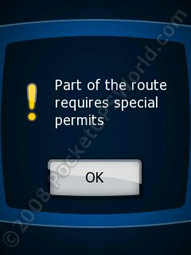
Select vehicle type from car, taxi, bus, emergency, pedestrian or bicycle. Select the types of road used for navigation from: unpaved roads, motorways, ferries, cross-border planning, permit needed, toll roads (eg M6) and charge roads (eg London Congestion zone). Note that this is only a preference – if the route needs it then the software will use a road type that you have said 'no' to. You have 4 choices for route calculation method: short, fast, easy (less turns) and economical.
Navigation
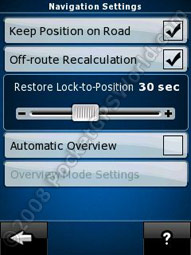
When turned off, 'Keep position on road' allows you to view your actual position on the map – handy if you are following your progress on, for example, a train. If turned on you get a small 'dot' on the map screen showing your actual position compared to the 'corrected' position. Automatic route recalculation can also be adjusted. Should you knock the screen and change your view then iGO 8 will automatically restore your actual position after a set time of inactivity defined by the 'Restore lock-to-position' option. Finally, 'Automatic Overview' will show a 2D overhead view of your route (at a user-defined scale) which will display when there are no manoeuvres for a user-defined distance. For example you could set it so that if there are no turns for 5 miles then it will display a 2D map at a 3mile zoom level.
Sound
Volume options include master volume, voice guidance volume and sounds for key/button presses. iGO 8 has a 'Dynamic Volume' setting – ie the faster you go, the louder it gets. This is customisable with respect to the speed at which the volume starts to rise and the speed at which maximum volume is achieved. A nice touch in iGO 8 is that any changes made to the master (device) volume are automatically restored when you close or minimise the application.
Regional
Program language, voice profiles, units (Miles/Feet, Miles/Yards or Kilometres/Metres) and date/time format and settings can all be adjusted here. There are 30 program languages to choose from and 50 voice languages. The UK voices are 'Kate' or 'James'; the majority have a choice of male or female voices. It is the regional settings that cause the first major problem with iGO 8 – see the inset box for more information.
Warnings
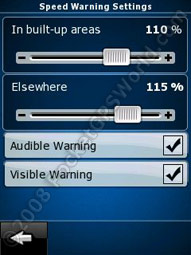
Audible and/or visual warnings can be set for when speeding (according to the data stored in the map) and you can set a percentage of the limit at which you get warned in both built-up areas and elsewhere. The visual warning shows the speed limit in a red circle on the bottom left of the screen and is shown constantly while you are over the limit. The audible warning simply states 'You are over the speed limit' and only sounds once until you drop below and then back over the limit. The speed camera warnings have options for audible warning ('off', 'while approaching' or 'only when speeding') and visible warning. Like most navigation software, iGO 8 has a safety mode whereby if this is activated you cannot operate the touch screen while driving. The final option is 'warn if too fast for a pedestrian'. If you have had it set as 'Pedestrian' then start to drive 'fast' it will ask if you want to change to 'Car' mode so that you will not be routed the wrong way down one-way streets or down unpaved roads etc. I like this touch, as I fell foul of this after using pedestrian mode in CoPilot Live 7 then wondering why I was being taken on silly routes with ridiculously long journey times!
Timezone Bug Warning
A major problem with iGO 8 out of the box is the automatic time-zone option. I found that after running iGO 8 my time would change by an hour as well as my timezone being changed. Initially I just corrected these and carried on as normal – but this is where the problems began. You see, Windows Mobile has this 'thing' where if an alarm is turned off after the timezone is changed it still remembers it. You end up with phantom alarms going off even when they are turned off in the alarms setting – and because of the change of timezone they are an hour earlier… I had 12 alarms going off at 5.30am at one point! Calendar alarms are also messed up in this process – I had reminders for appointments an hour after they should have been. The alarm problem was such an issue that I actually did 2 hard resets within a week just to stop them, but as soon as iGO 8 ran again the problem returned. After a considerable number of missed appointments and early mornings I found a way to fix the alarms issue, around the time that Nav N Go announced a 'fix' for the problem.
The problem is caused by entries in the Notification Queue in Windows Mobile not being deleted after they have run. There were two free tools that I used to clear all these old and duplicate entries: pmClean and SKTools Lite. pmClean is a basic tool for clearing out temporary files etc whereas SKTools Lite is more advanced and does a lot more – to view the entries in the notification queue (and subsequently delete the offending ones) go to View / Maintenance / Notifications Queue and remove offending entries under CALENDAR.EXE (for appointments) and Windows\clock.exe (for alarms).
To stop iGO 8 from changing the timezone like it does then you need to follow the instructions here. [make sure you edit the sys.txt in Program Files because if you edit the one on the memory card (like I did initially) then it will not work without a reinstall!]
GPS
This was covered earlier in the section and is only mentioned again as one of the options in the settings menu.
Menu
Here you can turn on animated menus where each option 'pops' into view; while this looks pretty it is of no practical benefit and means it takes longer until you can select anything in the menu – needless to say I disabled this rather quickly! You can also change the background image and skins from a handful of preset ones.
Track Logs
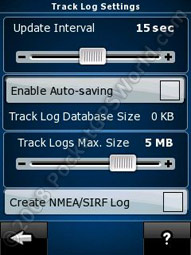
You can set the update interval (from 1 to 30 seconds) and specify how much space the logs should take up. For more advanced users you can create NMEA/SIRF logs, however these will take up a lot more space.
TMC
This setting allows you to set up a TMC module – it is similar to the GPS settings in that you can auto-search or manually configure the Port and Baud rates etc – I do not have a TMC module so there is no further mention of this feature.
Device
Configure how the backlight is used in day/night modes and set the screen orientation.
About
This contains all the legal information, version numbers, map data sources and license codes. It's very dull but there's a lot of it there if you like that sort of thing! In general the maps are provided by TeleAtlas (version '080215' which presumably means I have maps from 15th February 2008) with ten or eleven Eastern Europe / former Russian states being from various other sources.
 Simple mode
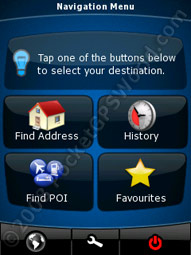
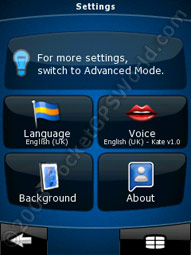
The final settings option is for 'simple mode' which vastly cuts down the amount of options you have. With simple mode on the main menu consists of Find Address, History, Find POI and Favourites; with the settings being limited to Language, Voice, Background and About. I like to fiddle, so I keep it on Advanced Mode!
A good feature to point out is that every settings page has '?' button that explains in more detail what each of the settings does. This is a nice touch, especially when, like me, you don't 'do' manuals!
Managing POIs and User Data
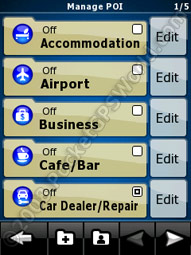
Selecting 'Manage' from the main screen takes you to an area where you can manage your saved routes, track logs, POIs, history, favourites, saved search criteria and your user data. It is also where you go to view any problems that were encountered when importing your contacts from Outlook.
You can delete items from
your history and delete or rename items in your saved routes, favourites and saved search criteria. The track logs area allows you to play back the logs, rename them, view on the 2D map and export them as a GPX file. There are links to a few that I recorded with iGO 8 in the links section at the bottom of the review.
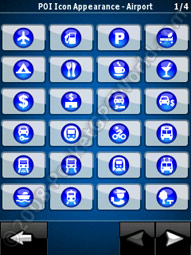
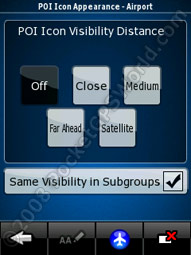
Managing POIs allows you to choose which categories (or sub-categories) are displayed on the map and from what distance and also select one of 75 pre-defined icons to use. You can easily add new categories and sub-categories in order to save your own POI locations to. This is on top of the thirty favourites you can save.
Finding a Destination
Pressing 'Find' gives you a selection of ways you can find your destination – you can search by Address, POI, History, Coordinate, Favourites or by finding a point on the map (the Pencil icon performs this option).
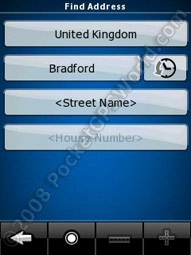
Choosing a Destination: Address
Address input is fairly straight forward but I have a few minor issues with the process. First up you select your country but instead of being able to type the name of the country you need to scroll though nine (eleven in landscape) pages with five (four in landscape) countries on each page – this is fine when travelling to Albania (the first in the list), but United Kingdom is on the last page. At least if you only travel in one country you only need to do this once as iGO 8 stores the last country and city you searched for.
After selecting your country you can then either input your required city or postcode by clicking on the <City Name> button – unfortunately it doesn't mention postcode until after you have selected this button. A more logical approach, in my opinion, would be to have the button as 'City / Postcode'. Selecting the city pulls up the QWERTY keyboard that hides any letters that cannot be used – for example if I input an 'S' various letters are 'hidden' such as 'd' and 'f' as there are no cities in the database that begin with 'Sd' or 'Sf'. This is actually really helpful as it basically warns you that you are spelling a city incorrectly by not letting you get too far into the word! Also, next to the letters you have input is a number that relates to how many cities there are which match what you have already typed. You can, at any point, press the 'tick' button at the bottom right to see this list but once the list is down to 5 or less it will automatically pull up the list for you to select which you want. There is also a 'history' button for city which lists all the recent cities and postcodes (from all countries) that you have searched for.
Once your town is selected you can then select your street in the same way and then house number. The range of house numbers is shown in the input box and if the number you need is not found then it warns you and jumps to the confirmation screen where you can select the desired area on the map before finishing. You can choose not to enter a house number and you have the option of viewing the street by pressing the 'road' icon to pinpoint your destination or pressing the 'crossroad' icon and then selecting an 'intersecting street' – again, only the letters in the intersecting streets are available to press.
I'm not so keen on the postcode input for two reasons; one rather petty of me and one actually rather more annoying. The petty complaint is that you MUST enter the 'space' between the two parts of a UK postcode – like I said, it's a petty one! The other is that once you have input and confirmed the postcode it jumps straight to the confirmation screen where you must manually locate the desired house number on the map rather than being able to simply type it in as an extra option.
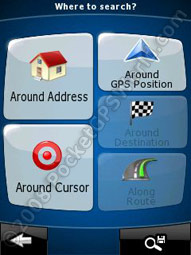
Choosing a Destination: POI
When choosing a POI to navigate to you are presented with six options: Around Address, Around Cursor, Around GPS Position, Around Destination, Along Route and Saved Criteria. These are already rather descriptive so the only real things to add are that selecting 'Around Cursor' you are shown the map and you can press the area on the map you want to use and press the 'tick' button. 'Saved criteria' allows you to use preset or custom search terms for POIs such as 'Cash Dispensers along my route' or 'Parking near my destination'. You can save up to 30 of these and they are managed in the 'Manage' section from the main menu. You get a specific icon depending on the area that the saved criteria searches (a chequered flag for searches around your destination, a blue arrow for around you GPS position, red rings for around cursor position and a road for along your route) – if you do not have a route planned then each one automatically becomes a search around the cursor position regardless of what option is saved. This is another nice touch to the interface and allows for quick access to commonly used searches.
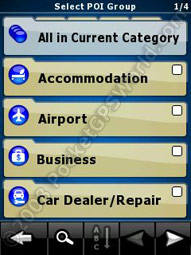
Once you have selected one of the five main search options (i.e. not a saved criterion) you are then presented with the various categories and subcategories that you can select. Choosing 'Along Route' automatically cuts down all the categories/subcategories/POIs to those within approximately 2.5miles from your route. There are a lot of stored POIs but unfortunately they seem very poor – petrol stations a few hundred metres out meaning you get routed through a housing estate with no petrol station in sight… Thankfully you can add custom POIs using Google Earth's .kml format. Copy these files to \Storage Card\iGO8\CONTENT\USERDATA\POI (you may need to create these sub folders) and then restart iGO 8 – remember if you want them to display on the map to turn this on in the Manage section of the software! When searching for the user-added POIs the software automatically adds the address details according to it's location on the map - this is a very nice feature. Be warned though, that it may take a while to import the data and the loading screen will appear to 'hang' saying 'STARTING' in the corner. Your Outlook Contacts are automatically added as POIs if you 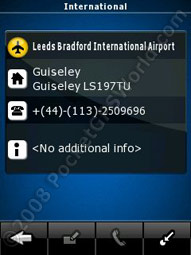 have address details saved – this works well but occasionally I have had some addresses that could not be found, however, manually searching for the address works. Any changes to contact addresses are automatically updated when iGO 8 starts running.
At any point during the search for POIs (eg main category or subcategory) to navigate to you can press the magnifying glass to search for a specific POI name – you can then view a list of these along with the relevant icons that describe the POI type. They show, by default, in proximity order but you can switch between this and alphabetical order very easily.
After selecting your POI you are shown some further details (road, postcode, phone number and 'additional info') but the 'phone' icon is always greyed out so you cannot call directly although the implication is that you should be able to. Press the pin-point icon to get to the confirmation screen.
 Choosing a Destination: History
This is simply a list of all the destinations you have searched for and includes POIs, addresses, cities, favourites and push-pins. The list is in chronological order (most recent first) and cannot be reordered to make finding a specific entry easier. Selecting one takes you to the confirmation screen.
Choosing a Destination: Coordinate
You can navigate directly to a set of co-ordinates in any of the following formats: decimal degrees (DD.DDDDD), degrees decimal minutes (DD MM.MMM) or degrees minutes decimal seconds (DD MM SS.S). Switching the format automatically updates any input you have already entered and once you accept the co-ordinates you are taken to the confirmation screen.
Choosing a Destination: Favourites
You can save up to 30 favourites and select them here for navigating to. Selecting one takes you to the confirmation screen.
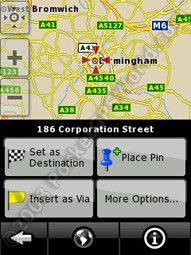
The Confirmation Screen
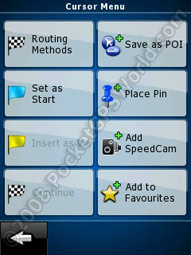
Regardless of how you select your destination, you always end up on what I have dubbed the 'confirmation screen'. This shows an overhead view of the map (with terrain colouring/shading) where you can pin-point your precise destination. Clicking on a road will display the road name and number and you also have a handful of options. The most used will be 'Set as Destination' which then begins to calculate your route. Other options allow you to place a pin (which can be navigated to and is visible from any zoom level – a handy way to mark a temporary 'favourite'), insert as a via point (if you have a destination already set) and see information about the actual point (such as the full address, the co-ordinates and nearby POIs). 'More Options…' allows you to set the current position as the start point, save it as a POI, place a pin, add a speed camera (to your own internal database and not to the PGPSW one) or add it to favourites. Be warned though that if you add a speed camera there is no easy way to remove an individual point or even any way to view/edit the details from it! To remove any, well all, custom added speed cameras simply 'remove user data' under 'Manage' and then 'User Data'.
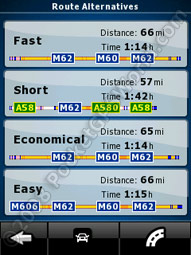 Also under 'More Options…' is one of the more powerful features of iGO 8 – the route alternatives. You do not need to go back to the settings and change all your preferences to see the different routes available; you can do this from here. By pressing 'Routing Methods' iGO 8 calculates all four routes (fast, short, economical and easy) and gives you a breakdown of time and distance. It also shows you graphically the road types you will travel on – the colours are taken from the map display settings. You can also change your vehicle type and road avoidances and these are recalculated straight away. Selecting one of these route options will begin navigation in the same way as 'set as destination' does.
Navigation
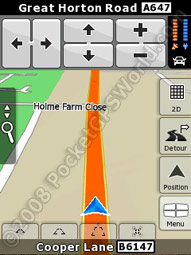
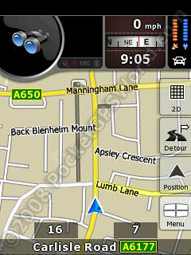
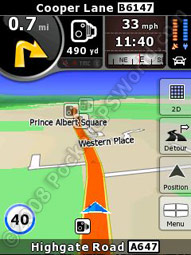
On first use I thought the map screen was quite cluttered and not overly clear or obvious but after a short time using it you do get used to it – perhaps because I'm more used to the more basic Garmin screen layout? Along the top are your status indicators, down the right and 'faded out' are your options and hidden on the left, until you press that area, are the zoom/pan/tilt options.
The graphic below aims to highlight each part of the screen layout during navigation mode:
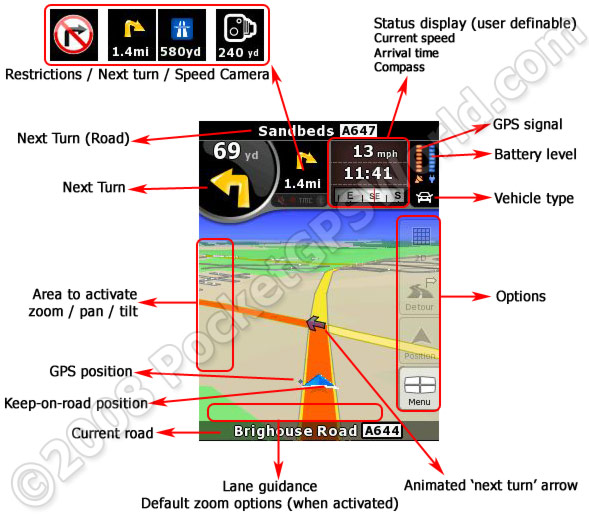
Note: you can also see an interactive version of the Landscape view here: http://navngo.com/pages/global/eng/igo_8_description which gives more information on each part of the screen by hovering your mouse over it.
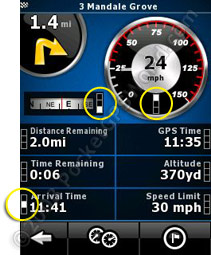 The 'Status Display' is customisable with any of the following and in any order you choose: current speed, compass, distance remaining*, time remaining*, arrival time*, GPS time, altitude and speed limit. Items marked with the '*' are available for either your destination or your next via point. If you do not have a route set then, for example, distance remaining will not show and will be replaced with the current time. On the screen shot to the right (the Trip Computer) you can see three small boxes next to each item (marked with a yellow circle), clicking on these multiple times will select the item and its position on the status display (top, middle or bottom). From this screen you can also view the trip statistics.
The default views seem adequate although the close-up view is a bit too close to use for driving. I usually ended up using the fourth option which auto-zooms in and out as you approach turns. By pressing the left hand side of the screen you can adjust the zoom, pan and tilt. This can also be done using the hardware keys and a list of these functions is shown in the box at the below. Whenever you rotate the view (or drag / move the map) you get a new button on the bottom to jump back to your current position. If nothing is pressed for a user-definable length of time then the view will automatically go back to normal.
Hardware Keys
Green or Red Call key – minimise iGO 8
Volume up / down - volume up / down
Up / Down (or circular dial) – zoom in/out
Left / Right – rotate left / right
GPS key (Button 1) – tilt down
Windows key (Button 2) – tilt up (move overhead)
Camera key (Button 5) – place pin
Voice Dial key (Button 6) – settings
Voice Dial key HOLD (Button 6) – select an area on the map to navigate to
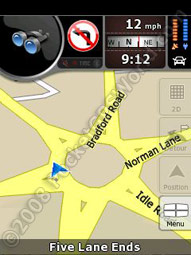
As you approach a roundabout the view pans to a static, overhead view so you can easily see your position on the roundabout as well as where you should be turning off. This is a really useful feature although if you have manually edited your zoom / tilt levels then these will be 'lost' and the software will revert back to the default zoom levels. I would have thought this could be 'hacked' by editing the sys.txt file (i.e. by adjusting the values for the default views) but it isn't something I have looked into. In practise it is usually a case of pressing the GPS key (Button 1) to tilt the view back down again.
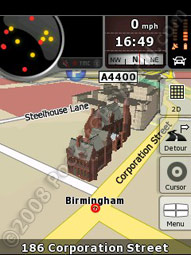
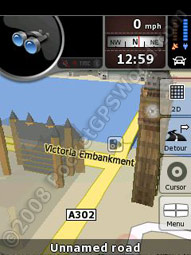
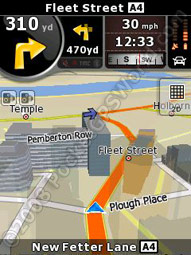
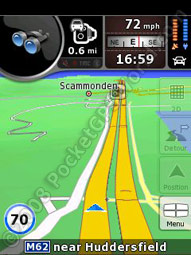
In use the view is perfectly useable with no issues with regards to clarity of the route. Turns are signalled on the actual map with a small animated arrow pointing your way as well as a bright orange route to follow. It also features lane guidance arrows with the required lane arrow highlighted in yellow and the others in white. Also, if there are a couple of roads in close proximity to a turn you will be told to "take the 2nd left" or "take the 3rd right" which helps to clarify! In areas with 3D buildings they fade out as you approach them so they do not obscure the view. Coming back from CeBIT in March I had iGO 8 running while I was on the train and Hannover is well covered with regards to buildings. They are actually accurate too with regards to their shape but I'm not one hundred percent convinced about their usefulness. While it may aid you somewhat to see what shape the building is where you turn, the fact that it will be faded out on the screen by the time you reach it means you cannot use it as a guide. From browsing the map I have found 3D buildings coverage good around Birmingham, London and Edinburgh. There will likely be more but I just picked a few larger towns to have a look around. This is where you need a more powerful device though as running test routes through London gave me regular 'out of memory' errors! This could no doubt be overcome by adjusting the detail in the 3D settings pages but I was reluctant to do so as Nav N Go list my device as compatible. I think the Landmarks are more useful for navigation purposes such as the Tower of London or Millennium Eye as they stand out more than the 'regular' buildings. The buildings data may be more useful once there is better coverage and devices are more powerful although this is a bit of a vicious circle – without the data no one can use it but with no one using it who would want to collect the data?!
On the subject of 3D navigation software I think the far better application in iGO 8 is the 3D terrain. The buildings, in my opinion, don't help that much, but the 3D terrain does give you a good feel of the land. The short animation below shows a recent trip along the M62 near Oldham where I approached a large valley. The lay of the land can easily be seen as you approach the dip as well as the position of a large hill to the left (nearer the end). This is the kind of 3D information that does make a difference when you are using it – I used the Garmin shortly afterwards and it seemed odd that it was so 'flat'!
There were no major problems with the routing other than the occasional 'why?' moment but I put this down to the map data as the turn restrictions are not all that accurate around my area. Also, I have yet to use a navigation device that gives the 'perfect route'.
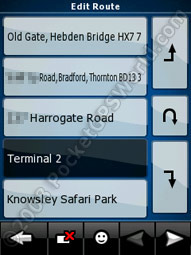 If you have a route planned and then find another destination you have the option of adding it as a via point. Once you have two or more via points you are shown a list of the points on your route that you can edit the order manually or, by clicking the smiley face icon, optimise the route. Each time a new via point is added, or the route is reordered, the route will automatically be recalculated.
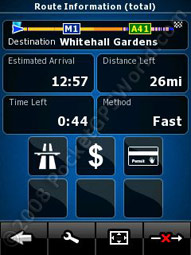
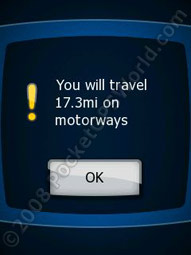
While navigating you can view information about the route via the 'Route' option in the main menu. You can see an overview of the route including the main roads being used and information about what kind of roads are used (eg 'you will travel 25 miles on motorways' or 'your route includes a toll road'). While the data is available to view here you do not get warned as you approach, for example, a toll road so you would be advised to edit your route before-hand to help avoid these. From the route information screen you can also edit the vehicle and road type settings. You can also save the route, preview the route (either fast or at 'actual' speed) and edit the route. 'Itinerary' allows you to view a list of all the turns and junctions/towns you will pass and, by clicking on a particular item, allows you to avoid any of the parts of the route – you can avoid that particular turn, the road or a distance on the route (1, 5, 10 or 3 miles).
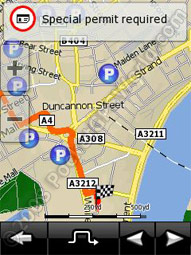
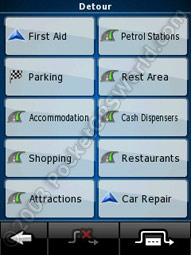
The main map screen has a 'Detour' button on the right hand side. Pressing this Gives you a selection of POIs you can search for. These are actually defined in the 'saved searches' and displays an icon according to where it will search; eg 'Parking' has a chequered flag icon therefore it will search for parking near your destination and allow you to detour to that. From the detour screen you can also avoid a length of the route (1, 2, 5, 10 or 30 miles) in order to get around jams etc.
Switching to 2D view gives you a North-Up view with the terrain-shading. There is no official 2D Track-Up view but the same effect can be achieved by tilting the view right up in 3D mode.
Voice directions are loud and clear with plenty of warning and reminders. If there are two or more turns in close proximity you will be told, for example, to 'take the second left'. Unfortunately iGO 8 lacks Text To Speech which Nav N Go claim to be in order to allow compatibility across a wider range of devices. It does help though by having a visual reminder of your two next turns at the top of the screen. Even on my relatively low spec-phone there is no real lag in rendering the display. When straying off the route recalculations are speedy and generally occur within two seconds of being off-route – the only time this differs, like any software really, is on sliproads where it is difficult to tell if you are in fact off route or it is just a small glitch in the GPS data. The 'dot' is a useful feature and it shows your actual GPS position – a nice way to see where you actually are in relation to a road when in a car park, for example. You can easily go 'off-road' by turning off the 'lock to road' feature which is handy if you just want to enjoy the cyber-scenery on a walk in the hills or do a bit of data-logging on a walk.
At the end of the review are some links to trips that I recorded; one in the car, one on train and one on foot. You can adjust the logging in increments of one second right up to thirty seconds between data points. Trips can then be played back in iGO 8 (either with or without being locked to the road) or they can be exported as a GPX file for use in other software / web sites.
Speed Cameras
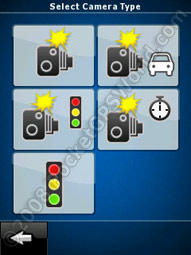
There are two ways to handle speed cameras in iGO 8. The first, and most basic, is to save a point as a Speed Camera similar to how you save would a favourite. You can set the camera type (fixed, mobile, redlight, redlight and speed, average speed) as well as the directional information (current direction, other direction, two ways, any direction [the azimuth/heading angle is added automatically from your current status]) and the speed from 'no limit' and then 20-130 in increments of 10. Unfortunately I have not found any way to edit cameras added in this way.
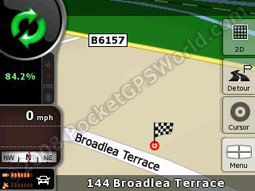
The second way is to use the PocketGPSWorld.com Speed Camera Database for iGO – this is one of the versions that includes directional data and it works really well. You only get warned of cameras that affect you – i.e. those in your direction of travel or those that are reversible / multi-angle. When passing through a SPECS (average speed) zone you are shown the current average speed underneath the camera icon. This works quite well except for the fact that iGO 8 assumes that all SPECS work in pairs when, in reality, you will often get them in threes. When this is the case it means you constantly get an average speed warning until you reach another SPECS camera... The only way around this is to restart the software. It would be nice if Nav N Go could perhaps add a new camera category for a closing SPECS camera so when this is reached (regardless of how many cameras have been before it) it ends the warnings. [Note: this has already been suggested to Nav N Go but feel free to request it yourself!]
For your warning you get an audible 'blip' (nice and clear) as you approach from 500yards (not editable) along with the speed in a blue circle in the bottom left of the screen. The top status display shows an icon (not user definable) dependant on the camera type and a standard 'speed camera icon' is shown on the map regardless of camera type. Going over the set speed limit of the POI invokes a hideous set of bleeps which is annoying enough to make you slow down but not that awful that it makes you want to change it – a good job, really, because you can't!
EDIT: It has been pointed out in the discussion forum that when in Simple Mode you do not get any speed camera warnings. This has now been raised with Nav N Go and they have confirmed that it is the intended behaviour!
Other Comments
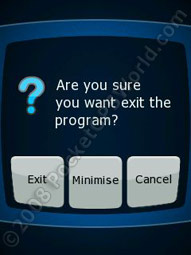 There are just a few final things to note before I conclude; Pressing the power button ('soft off') while iGO 8 is running does what you would expect it to do, however there is no way to turn the device back on (at least on the test device) without resorting to a soft reset. The same also happens if iGO 8 is minimised and the device goes into standby mode. This is an annoying bug with no workaround that I am aware of - other than ensuring you fully close the program if your phone is likely to go into standby! Also, during testing I was unable to accept incoming calls while iGO 8 was running – it would ring and display the caller ID but I could not answer it! Instead I would have to close the software and then return the call - I think it is safe to assume that this is down to the device I was running the software on simply not having enough free memory.
Round Up
Pros
- Easy to install
- Looks good
- 3D terrain is a useful guide to the lay of the land
- Sensible routing options
- Directional speed camera warnings
- POI support (using .kml files)
- POI categories are customisable
- Contacts addresses automatically added as POIs
- Excellent coverage for maps
- Very customisable
- Multiple waypoints with route optimisation
- Ability to save routes
Cons
- Locked to memory card so no way to move it to a larger capacity card
- Very memory hungry
- No text to speech
- User interface take a bit of getting used to
- Built in POIs (Teleatlas) are poor in terms of co-ordinate accuracy
- Limited areas (in the UK) with 3D buildings data
- Only 30 favourites can be saved (although the use of pins means you don't always need to save a destination as a favourite)
Conclusion
The main selling point of iGO has clearly always been the 3D aspect of the software. While the 3D terrain works well and adds to the navigation experience, I don't think the 3D buildings (except for the landmarks) are actually that useful. There are a lot of options in the software to allow adequate personalisation and the routing engine is good with no silly routes offered during testing. Directional camera warnings are far superior and work very well offering 'one-up' on many other PND's or software solutions. The majority of the issues faced were really down to the (relatively lo-tech) device on which the software was tested – more modern (and future) devices will likely be able to handle the software better - particularly as there will likely be more buildings data in the not-so-distant future. Having said that, it is still useable though! Nav N Go's iGO 8 is certainly a worthy contender for PDA navigation solutions.
References & Links:
Comments?
Have any comments about this review? Post them here.