| Review by MaFt
(Matthew Morley)
 Introduction Introduction
Having been an advocate of Garmin since my first PND (StreetPilot i3 in September 2005 – I can’t believe it cost £200!) and subsequent Nuvi 360 and Pink Nuvi 200 (it’s the wife’s, honest!) I was quite looking forward to reviewing their latest offering, the Nuvi 710.
At present the 7xx range of Nuvi’s is Garmin’s flagship range (until the recently announced 8xx series is actually released!) and features a host of extras such as Bluetooth hands-free calling, FM transmitter, FM Traffic module (on the ‘T’ model’s only), Route planning (up to 500 WayPoints) with optimisation, GPS data logging, MP3 player, picture viewer, pin-lock, language guides etc etc etc… Note that text-to-speech directions are only available on the 760/770 – the only other differences are the map data (760 has European mapping, 770 has Europe and America). Each of the 7xx range has a sunlight-readable 4.3inch widescreen and with dimensions of 12.2 x 7.6 x 2.0cm (WxHxD) is nice, slim and easily pocketable.
Oh, and Garmin have finally added a QWERTY keyboard option!
Garmin have always been very coy regarding details of which GPS chipsets their units use and the 710 is advertised as having a “high-sensitivity receiver” which it does appear to be as these newer Nuvi’s (along with the 200 range which use the MTK chipset) no longer sport the flip-up antennae.
Well, let’s see what we have…
In the Box
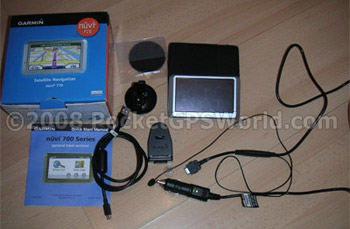
I’m not as excitable as Darren when it comes to opening boxes with Sat-Nav’s in, it was just a cardboard box with some cardboard inners and some bags that contained the following:
- Garmin Nuvi 710
- Windscreen Mount
- GTM21 FM Traffic Receiver / Power Supply
- Dashboard Mounting Plate
- USB Lead
- Leather Case
- QuickStart Guide
There is no mains power supply so the only way to charge the device is either in use with the joint power supply / TMC unit or via USB connected to the computer. It’s also worth noting that there is no manual included either printed or on CD. A quick visit to the Garmin site informs customers that “No manuals are currently available for this product” – not very useful… However, it appears that the manual for the Nuvi 760 is a generic manual for the 7xx range and can be downloaded from here.
There is also no software CD but as the Nuvi is designed to be accessed as ‘removable storage’ there is no need for any drivers for both PC or Mac users. The only software you will need is WebUpdater and POI Loader – both of which are available for free from the Garmin website.
Setting Up the Nuvi
On its first run out of the box as a brand new unit it took around 30 seconds to get a satellite fix which I thought was quite impressive. Warm starts take a matter of seconds and cold starts approximately 20-30 seconds obviously dependant upon location. I live on top of a hill in the middle of nowhere so tall buildings blocking the satellite signal are not something I encounter on a daily basis! Having said that, driving through the town centre did not cause any major problems with satellite signal strength. It would have been interesting to see how many satellites the unit had fixed onto both at home and in the town centre but Garmin decided to remove this function – on previous models such as the 3xx range you used to be able to press the satellite signal strength meter in the main menu to be able to get more detailed information. While it may be a feature that not many users would require, it seems such a trivial one to actually remove it – the device needs to know which satellites it is receiving data from anyway so displaying this information hardly requires any extra processing power, does it? There is also no option of switching between ‘standard GPS’ and WAAS/EGNOS so one can only assume that the devices will use WAAS/EGNOS signals if they are present but nothing is mentioned of this.
Set up in the car is pretty straight forward, if not slightly cumbersome due to the poorly designed GTM21 traffic receiver / power supply. The windscreen sucker mount has been improved since the earlier devices and seems a lot stronger – Garmin units often suffered from poor suction and falling devices with any slight change in temperature! Even having the blower on full heat I never had any Nuvi suicide attempts. I think the record for my Nuvi 350 was 14 ‘leaps’ in an hour! A couple of hours driving with the new design sucker mount (even on the corner of the windscreen with the most curvature) did not cause any problems.
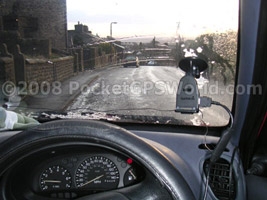
Powering the unit is a cumbersome and poorly thought out process. The unit is put into ‘computer-connection’ mode if a ‘standard’ mini-USB power lead is inserted into the USB port under the unit and the GTM Traffic receiver / power lead is not a standard connection. The power lead fits into the side of the cradle and because power and FM receiver is all bundled into one the cable is very thick and practically impossible to tuck away. You can see in the “what’s in the box” photo above that the cable wouldn’t even coil up nicely for a photo! Also, because the power and FM receiver is all in one it’s all or nothing – the FM receiver is in use whether you want it or not… If you’re not using it then you either have the aerial pointlessly stuck to your windscreen or some extra bits dangling by your legs. Well, that is unless you want to pay £17.01 (plus VAT) for a power lead without the FM receiver. It doesn’t look pretty either when it’s connected up and there’s a 2mm gap between the power supply and the cradle that gives the impression that it is not properly connected – it is, however, and quite firmly although how this would fair after a years use with the weight of the extra thick power cable is anyone’s guess.
 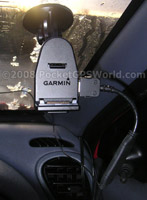
Above: The improved windscreen sucker (left) and huge TMC / power cable (right)
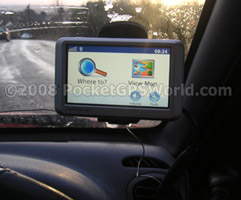
Below: Connected up with the FM aerial (left) and the Nuvi 710 in place (right)
Using the Nuvi
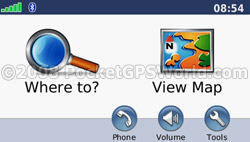
On powering up the Nuvi you are greeted with the (new since the Nuvi 2xx range) main menu screen. There are two main options (“Where To” and “View Map”) along with a row of smaller icons for “Stop”, “Detour” (when navigating), “Phone” (when connected via Bluetooth), “Volume” and “Tools”. It is actually well laid out and quick to get used to. As mentioned previously, you can no longer press the satellite signal meter to see any extra data but pressing the time in the top right will display the time settings where you can set the time zone, time format etc. Aside from the time settings everything else is accessed via the main menu icons that I just mentioned.
|
 |
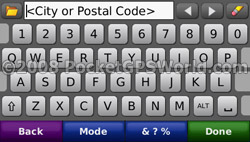
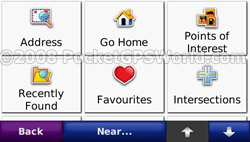
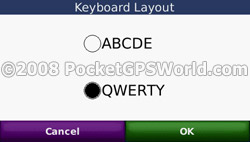
Where To gives you the following input options: address (by post code or address), go home, points of interest, recently found, favourites, intersections, extras (this is where custom POIs are now located), cities, routes, browse map and coordinates [sic]. Put simply, it’s quite difficult NOT to be able to get directions! On inputting an address you get to see the first major advance in Garmin’s software – the addition of a QWERTY keyboard! Although the ABC keyboard is used as default it was easy enough to change it to QWERTY in the settings (perhaps only because I knew of the new keyboard from seeing the unit at IFA at the end of last year?). Regardless – it is an often requested and welcome addition!
|
 |
Full UK postcodes can be used and because of the widescreen there is no need to switch between letters and numbers. One slight annoyance is that once a full postcode and house number has been input the confirmation screen will not display the last two characters. Omitting the house number causes the unit to display the full postcode. For example BD1 2LF will display “Sunbridge Road, BD1 2LF”. However, adding the house number will cause it to display “1 Sunbridge Road, Bradford, W.Yorks, BD1 2”. It’s only minor but it’s always nice to have a full confirmation of what you input before you commit to driving there!
|
 |
Once a route is set you are shown two extra options on the main menu – “stop” and “detour”. They are fairly self-explanatory so I won’t go into details but regular users of TomTom would be surprised that there are no further settings to ‘detour’ – it just gives you a new route rather than being able to miss out a set distance on the current route etc. Pressing ‘detour’ again puts you back to the original route. An excellent new feature on the Nuvi 7xx range are the multiple waypoints. Previous Garmin devices were limited to a single waypoint but this new range allows up to 500 waypoints. There is a slight limitation though that saving a favourite reduces the number of waypoints available but even with a hundred favourites saved that leaves 400 waypoints that can be saved over 10 routes for later use. In reality though it is certainly not a limiting factor.
|
Maps, Routes and Waypoints
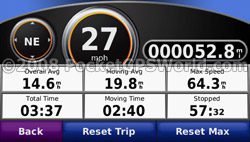
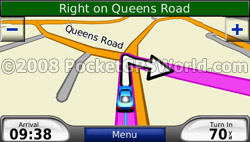
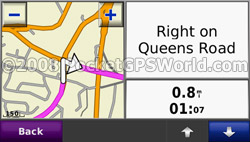
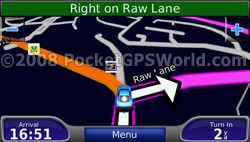
While in Map View, whether navigating or driving freely, there are a number of extra ‘shortcuts’ you can use. Pressing the Speed / ETA in the bottom left will display the Trip Information screen which displays current speed, average speed, direction of travel etc. During navigation pressing the top bar will display a Turn List for the entire route and the distance between each turn. Pressing one of these turns in the list will then display a close up view of that turn. Back on the main map page you can press the ‘Turn In xxx Yards’ to display a close up of the next turn with an audible reminder of the distance until this turn.
|
 |
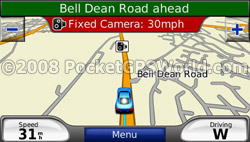
You can save favourites at any time by pressing the map screen – this displays the position at the time of pressing as opposed to updating constantly with your current position. This makes it ideal for capturing speed camera locations as you can press the map and once you get chance to pull over you can then save it and edit it with the relevant details without having to find the location on the map again. You can, if you need to, move around the map and select a different position to save as the favourite if you do not want your current position. Favourites can be edited via Where To, Favourites then select the desired item and press Edit. Within Tools, My Data you can select multiple favourites / routes to delete them en-masse rather than having to select
them and delete them one by one.
|
 |
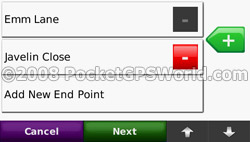
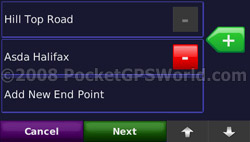
The routing engine is very good – the routes chosen seem sensible and are calculated within a reasonable time. Poor design pokes its ugly head back in though when creating routes with multiple waypoints. The actual method of inputting extra waypoints into a route is very simple – either click to add a new start or end point or click the green ‘+’ or red ‘-‘ to add or remove a waypoint. Once you save the route it does it’s calculation in the order that you have input the route – with eight waypoints around Bradford this took around 45 seconds with the total distance being 24 miles. I was testing the route facility for camera verification so obviously I needed the optimal route as the order was not
important.
|
 |
| However, to optimise the route you need to select ‘Where To’ then ‘routes’, select the route in question, press ‘edit...’, scroll down and then you get the option to ‘optimally reorder (the) points’ – which, again, takes extra calculation time. Surely a better method would be once you have set your waypoints to have the option to ‘calculate route now’ or ‘optimise then calculate’. |
 |
As it stands there are too many button presses and too much messing about in order to get the optimal route – I didn’t even think the Nuvi had an optimisation feature until I was fiddling about and found it purely by chance! It is in the manual though but only mentioned in the section regarding editing routes – again, it would make sense (to me at least!) to at least mention in section on creating a route that routes can be optimised later by editing the route... As a side issue, optimising the camera verification route knocked off 7 miles.
While you are en-route you can add waypoints by seleting a new destination and it will ask whether to set this as a new destination (thus clearing your current route) or add as a new waypoint. Once added as a new waypoint you can then go to ‘Where To’, ‘routes’ then select ‘current route’ and tell the Nuvi to optimise the route again taking the new waypoint into account or you can manually edit the waypoints.
Another point worth mentioning is that you can also import routes created on MapSource. That’s all I can tell you because I don’t have MapSource and all the manual states is “If you have transferred a route from MapSource, touch Import Route from File to use that route”.
Where Am I?
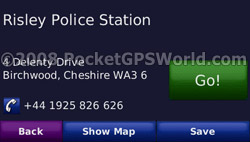
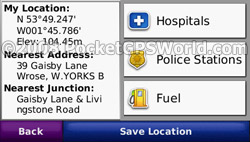 This is another new feature and is quite similar to TomTom’s ‘help’ feature in Navcore 7 although I prefer the layout on the Nuvi. The left side of the screen displays the current location at the time of pressing ‘Where Am I?’ along with the nearest address and junction. In the latest firmware this information is updated every few seconds rather than showing where you were at the time. The right hand side has links to the nearest hospitals, police stations and fuel which it gets from the built in POIs in the map data. This is another new feature and is quite similar to TomTom’s ‘help’ feature in Navcore 7 although I prefer the layout on the Nuvi. The left side of the screen displays the current location at the time of pressing ‘Where Am I?’ along with the nearest address and junction. In the latest firmware this information is updated every few seconds rather than showing where you were at the time. The right hand side has links to the nearest hospitals, police stations and fuel which it gets from the built in POIs in the map data.
I apologise for the comparison with the equivalent TomTom feature as this is a review and not a comparison but here is my last comparison: My nearest police station, apparently, is 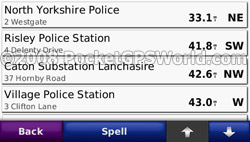
33.1miles away (as the crow flies) in Thirsk, North Yorkshire. The ‘amusing’ part, or rather the sad part, was that I was sat in my car outside my son’s pre-school which happens to be opposite North Bradford Police Headquarters… On closer inspection there were no police stations in West Yorkshire at all – maybe that’s why crime is on the up?! You may well say that this is not Garmin’s problem as the data is built into the maps but in a very simplified way this is Garmin unit that does not give me correct information.
Thankfully Hospitals and Fuel were much more accurate and once you have selected the required POI you can, of course, navigate to it in the same way as any other address or POI. It would be nice if these shortcuts could be customised to use your own POI files so they could easily be updated. Until such a feature is added it’s probably a safer bet to use our POI files and find the nearest places via Where To, Extras, Custom Points.
Traffic
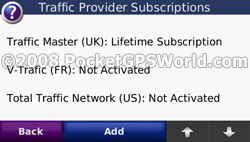 Putting the awful design of the TMC receiver / power supply to one side for a moment, FM traffic reception actually seems quite good. I had no issues while driving around with loss of signal to the unit. There are two LEDs on the power supply that give the status of the FM signal and power. Flashing yellow indicates it is currently working out which country you are in, solid yellow indicates it is searching for a signal, solid red indicates it has temporarily lost the signal and solid green indicates normal traffic data. In case you were interested, Garmin use RAC-TrafficMaster data as oposed to iTIS. Putting the awful design of the TMC receiver / power supply to one side for a moment, FM traffic reception actually seems quite good. I had no issues while driving around with loss of signal to the unit. There are two LEDs on the power supply that give the status of the FM signal and power. Flashing yellow indicates it is currently working out which country you are in, solid yellow indicates it is searching for a signal, solid red indicates it has temporarily lost the signal and solid green indicates normal traffic data. In case you were interested, Garmin use RAC-TrafficMaster data as oposed to iTIS.
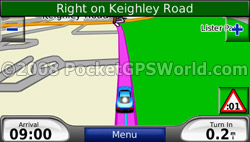 In use I was warned of traffic on my route which was relatively accurate (a bit of a delay during rush hour) but was not able to fully test it out due to lack of ‘events’ near me! I couldn’t warrant the twenty-plus mile round trip to drive to Leeds and back to see if there really was a traffic jam...! In use I was warned of traffic on my route which was relatively accurate (a bit of a delay during rush hour) but was not able to fully test it out due to lack of ‘events’ near me! I couldn’t warrant the twenty-plus mile round trip to drive to Leeds and back to see if there really was a traffic jam...!
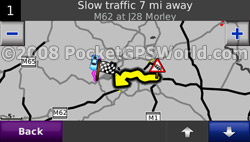
Viewing traffic events displays an overview map showing your current route, location and traffic reports and pressing ‘View by Road’ (note that the screenshot that says ‘details’ was taken from a different firmware version and was replaced with ‘view by road’ as per the help files on the Nuvi) gives you a break down with three status colours: green if there is no traffic on your route then yellow and red for severity. Selecting a road from this list will give you more information about a particular incident such as ‘Slow traffic 7 miles away, M62 juntion 28 Morley’.
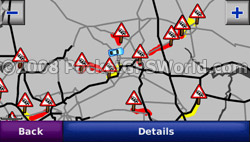 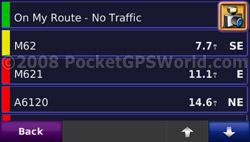
You can choose whether or not to automatically avoid traffic reports in the Navigation settings – which is a good thing considering you have to have the traffic receiver connected up to power the unit! And if a nw traffic incident comes through while driving you will be alerted on screen with an icon in the corner which can be pressed for more information and from there you can choose whether or not to avoid it.
Data Logging (Trip Log)
Initially I thought the Trip Log would be a useful feature – automatically logging journeys and locations is a good idea in theory. However, I’m not sure on the usefulness of Garmin’s offering on the Nuvi 710 – you can’t do anything with it other than display a thin blue line on the map for where you’ve been and erm.. delete it! I would have thought you could export a GPX file (or similar format) to an external program but there is no mention of this feature in the manual and I could not find any obvious candidate for such a file within the device contents either.
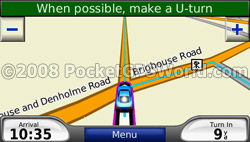 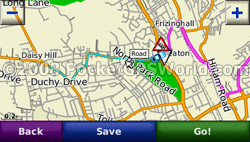
Above: the thin blue line tells me I've already driven on this road...
FM Transmitter
 Another feature that is great in practise but is severely flawed in the Nuvi 710 is the FM transmitter. I wasted nearly an hour trying to get something useable and gave it up as a bad job. Another feature that is great in practise but is severely flawed in the Nuvi 710 is the FM transmitter. I wasted nearly an hour trying to get something useable and gave it up as a bad job.
The built-in FM transmitter will (apparently) send an FM signal from 88.1FM through to 107.9FM in increments of 0.2. You can either manually select a frequency by pressing left/right to change frequency (why you can’t just type in a value is beyond me) or you can tell the Nuvi to Auto Tune. This takes a few minutes but finds all the ‘free’ FM frequencies then prompts you to retune to each one in succession until you can hear the output from the Nuvi.
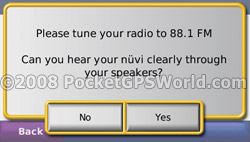 A nice idea if it worked! Going from 88.1 up to 93.5 in 0.2 increments and never getting any signal is enough to annoy even the most patient of users so I tried it manually. I found an empty frequency on my stereo (100.5) then set the Nuvi to 100.5 and heard nothing. After a few more attempts with different frequencies I tried something different. With the stereo set to 100.5 I went through the frequencies on the Nuvi and eventually got a signal with the Nuvi set to broadcast at 100.9 – for a short time at least… I then managed to get it with the Nuvi set to broadcast on 99.7 and then lost it again, and then 98.1 and then lost it… It just doesn’t seem to broadcast on the correct frequency! Aside from being a bit quiet I have not had any problems with the A nice idea if it worked! Going from 88.1 up to 93.5 in 0.2 increments and never getting any signal is enough to annoy even the most patient of users so I tried it manually. I found an empty frequency on my stereo (100.5) then set the Nuvi to 100.5 and heard nothing. After a few more attempts with different frequencies I tried something different. With the stereo set to 100.5 I went through the frequencies on the Nuvi and eventually got a signal with the Nuvi set to broadcast at 100.9 – for a short time at least… I then managed to get it with the Nuvi set to broadcast on 99.7 and then lost it again, and then 98.1 and then lost it… It just doesn’t seem to broadcast on the correct frequency! Aside from being a bit quiet I have not had any problems with the
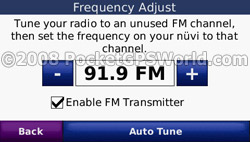 TomTom 520’s FM transmitter in the same car, in the same location with the same stereo so I can only presume that the issue is with the Nuvi. TomTom 520’s FM transmitter in the same car, in the same location with the same stereo so I can only presume that the issue is with the Nuvi.
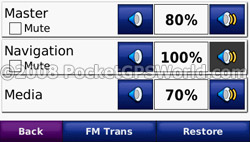
If the FM transmitter worked it is an ‘all or nothing’ option for what is sent via FM. Unlike the TomTom devices which allow you to, for example, use the device speaker for voice commands and the FM signal for music. However you are able to control individual volume levels for music and voice commands which is a useful feature.
UPDATE: Since writing this review various forum members have confirmed no issues with their Nuvi 7xx series devices with regards to the FM transmitter. Their units also go up in increments 0.1 so it would appear that there were some issues with the unit I was sent for review.
The Menus
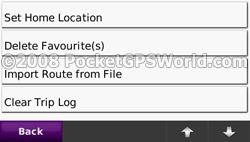
 The Nuvi’s menu system strives to be user-friendly by limiting the sub-menus to a maximum of four items. While in theory this is a nice idea, the reality is that related items end up in different sub-menus and the menu system seems illogical at times. One example is the Trip Log – you choose whether to display the trip log or not in Tools, Settings, Map. But to clear the trip log you need to go to Tools, My Data, Clear Trip Log. Surely logically these two options should be together? Another example is the units (miles / kilometers) which are located under Tools, Settings, System would, in my mind, be better placed in Tools, Settings, Navigation along with Route Preference and Avoidances. Ditto for Usage Mode for selecting Automobile, Bicycle or Pedestrian The Nuvi’s menu system strives to be user-friendly by limiting the sub-menus to a maximum of four items. While in theory this is a nice idea, the reality is that related items end up in different sub-menus and the menu system seems illogical at times. One example is the Trip Log – you choose whether to display the trip log or not in Tools, Settings, Map. But to clear the trip log you need to go to Tools, My Data, Clear Trip Log. Surely logically these two options should be together? Another example is the units (miles / kilometers) which are located under Tools, Settings, System would, in my mind, be better placed in Tools, Settings, Navigation along with Route Preference and Avoidances. Ditto for Usage Mode for selecting Automobile, Bicycle or Pedestrian
 Mode. Keyboard Layout (ABCDE or QWERTY), in my opinion, should be in the Display settings but it seems that anything that didn’t physically fit elsewhere has been placed under ‘System’. Mode. Keyboard Layout (ABCDE or QWERTY), in my opinion, should be in the Display settings but it seems that anything that didn’t physically fit elsewhere has been placed under ‘System’.
Having said all that, most users would only own a single device so it is likely that after a relatively short period of use that the menu system would become second nature. It may just take a bit of getting used to!
A nice touch in the menu’s is the use of a Night Mode. If the unit is in night mode then all the menu’s are darker to fit in with the idea of stopping the display being so bright! You can see the difference in the screen shots.
Above: Waypoint menu in both Day (left) and Night (right) mode.
Help
 The built in help files are a very useful feature and have been included since the first Nuvi – I’m happy to say this is one feature that has been retained and is very handy in the absence of a user manual! The Nuvi contains useful guides for each feature of the device grouped together by their menu position – i.e. to find information about the Route Planner (which is located under Tools, Routes) you would go to Help. Tools, Route Planner – logical really. You can also perform a search for a specific term although this doesn’t appear to work very well... I searched for ‘traffic’ while I was in the Tools sub-menu and the first result was ‘Editing Saved Places’ which, upon reading, does not mention the word ‘traffic’ at all nor is it relevent to any of the traffic features of the device. However, in the root of the Help menu the search for ‘traffic’ brings back the expected results. The built in help files are a very useful feature and have been included since the first Nuvi – I’m happy to say this is one feature that has been retained and is very handy in the absence of a user manual! The Nuvi contains useful guides for each feature of the device grouped together by their menu position – i.e. to find information about the Route Planner (which is located under Tools, Routes) you would go to Help. Tools, Route Planner – logical really. You can also perform a search for a specific term although this doesn’t appear to work very well... I searched for ‘traffic’ while I was in the Tools sub-menu and the first result was ‘Editing Saved Places’ which, upon reading, does not mention the word ‘traffic’ at all nor is it relevent to any of the traffic features of the device. However, in the root of the Help menu the search for ‘traffic’ brings back the expected results.
Bluetooth Handsfree
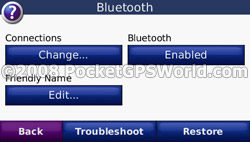
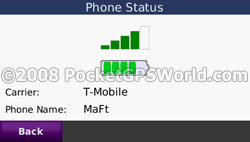 The Nuvi’s bluetooth functionality is one thing that has worked since Garmin first added it to the 3xx range of Nuvi. The 710, I’m pleased to say, is no exception. There were no issues connecting it to my T-Mobile MDA Compact III or the wife’s Samsung SGH-E530. In the Bluetooth settings you can rename the Nuvi to give it a ‘Friendly Name’ which displays on your phone. Once connected your phone book will be imported automatically and making calls is as easy as selecting a contact, a POI, ‘call home’, manually dialling a number or use your phone’s voice dial functionality. Depending on your phone you can also view and send text messages, view your recent call logs and check the phones signal strentgh and remaining battery power. The Nuvi’s bluetooth functionality is one thing that has worked since Garmin first added it to the 3xx range of Nuvi. The 710, I’m pleased to say, is no exception. There were no issues connecting it to my T-Mobile MDA Compact III or the wife’s Samsung SGH-E530. In the Bluetooth settings you can rename the Nuvi to give it a ‘Friendly Name’ which displays on your phone. Once connected your phone book will be imported automatically and making calls is as easy as selecting a contact, a POI, ‘call home’, manually dialling a number or use your phone’s voice dial functionality. Depending on your phone you can also view and send text messages, view your recent call logs and check the phones signal strentgh and remaining battery power.
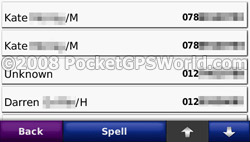 If you get stuck in a menu-system while attempting to change gas suppliers via an Indian call-centre you can switch to tone dialling to make it possible. Out of the box, however, the tone dialling did not appear to function correctly – it sounded the tone but it did not register on the call and kept on sounding the tone until I switched the Nuvi off with... Updating the device to the latest firmware seems to have improved this in that the tones are now registered but it will sound the tone for around 8 seconds which tends to make you miss the next spoken menu option! For me, personally, I don’t have this high on my list of moans as I would rarely make these calls while driving. However, it could seriously inhibit someone ‘out in the field’ who relies on this functionality to relay messages to and from a control centre. If you get stuck in a menu-system while attempting to change gas suppliers via an Indian call-centre you can switch to tone dialling to make it possible. Out of the box, however, the tone dialling did not appear to function correctly – it sounded the tone but it did not register on the call and kept on sounding the tone until I switched the Nuvi off with... Updating the device to the latest firmware seems to have improved this in that the tones are now registered but it will sound the tone for around 8 seconds which tends to make you miss the next spoken menu option! For me, personally, I don’t have this high on my list of moans as I would rarely make these calls while driving. However, it could seriously inhibit someone ‘out in the field’ who relies on this functionality to relay messages to and from a control centre.
Audio quality is clear but, like most in-car systems, you need to speak fairly loudly – not too much hassle really if you think that the microphone in the unit could be over 15 inches away from you! I don’t have any voice dialling set up on my phone so I was not able to test the effectiveness of the voice dialling built into the Nuvi.
The ‘Extras’
Included under this section are the media player (MP3 or Audible), language guide, currency convertor, unit convertor, calculator, picture viewer and world clock. Al these were covered in more detail in the review of the Nuvi 350 (http://www.pocketgpsworld.com/garmin-nuvi-review.php) and haven’t changed enough to warrant a fresh review!
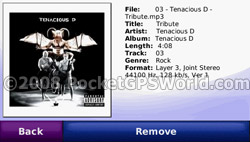
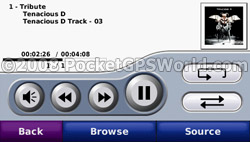 The MP3 player will use artwork images saved in the id3 tag or display a picture file from the same folder if no image is present in the tag itself. The Nuvi 710 also supports playlists. Pressing the album art will then display further information about the track from the id3 tag such as genre, album, track length etc. While the player is in use the Nuvi displays a shortcut icon in the bottom left of the map screen to quickly jump to the media player. Sound quality is good and you can make use of the 3.5mm ‘headphone’ socket to output the audio to your car stereo should you not manage to get the FM Transmitter to work. The MP3 player will use artwork images saved in the id3 tag or display a picture file from the same folder if no image is present in the tag itself. The Nuvi 710 also supports playlists. Pressing the album art will then display further information about the track from the id3 tag such as genre, album, track length etc. While the player is in use the Nuvi displays a shortcut icon in the bottom left of the map screen to quickly jump to the media player. Sound quality is good and you can make use of the 3.5mm ‘headphone’ socket to output the audio to your car stereo should you not manage to get the FM Transmitter to work.
Other Screen Shots
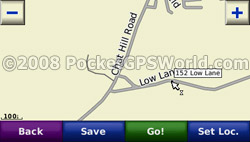
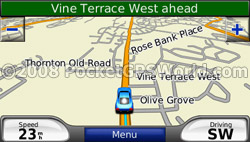
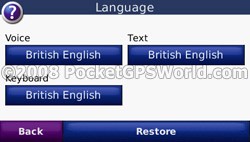
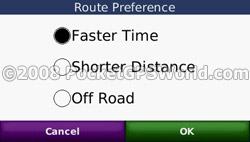
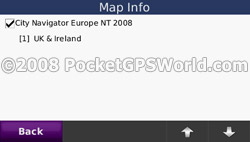
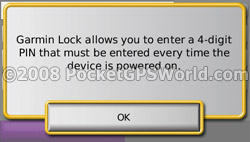
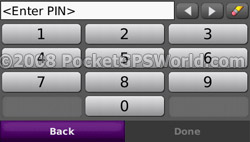
Before I summarise I thought I would add a selection of other screen shots from the Nuvi 710:
Summary
I can’t fully decide whether or not I like the Nuvi 710. The features that do work, work well: multiple waypoints, bluetooth handsfree, MP3 player etc. But there are plenty of things that I would not be too willing to part with £275 for. The display is very clear even in direct sunlight and the unit is slim enough to fit in a pocket. The sucker mount is much improved from previous models but the combined TMC / power cable is an absolute nightmare! I would definately recommend having a go with the unit to see if you can put up with it’s often frustrating style! The unit has potential but I would have expected such a major player as Garmin to iron out issues before relasing the device – at least a small consolation is that the problems I’ve highlighted should be fixable via firmware updates.
Pros
- Multiple waypoints
- Nice,clear, sun-readable screen
- Slim design
- Bluetooth handsfree works well
- Updated suction mount has yet to fall off!
- Easy to add custom POIs (including PocketGPSWorld.com speed cameras)
- Good built-in help files
Cons
- FM transmitter was unusable
- Menu system is not the easiest to navigate
- Connection via USB cable sets device into ‘computer mode’ so cannot use device while charging indoors
- Combined TMC / power lead is poorly designed
- Relatively pointless Trip Log
|