 Review by Dave Burrows Review by Dave Burrows
Introduction
TomTom Navigator has gone through three incarnations over the past three years. TomTom then decided to move everything to a core navigation engine which unfortunately has delayed the PPC release. Since then we've seen the core navigation engine on the Palm OS, GO and SmartPhone's. Recently the Pocket PC has caught up with the release of the HP Navigation Kit and now TomTom are ready to release TomTom Navigator 5.
As expected and forecast for well over a year, TomTom Navigator 5 is running on the core navigation engine.
Why a Core Navigation Engine ? It's simple. Why re-write 4 or 5 different versions of your application on multiple platforms requiring multiple tools, when, in-fact you can use a standard processor call set and program the application for one operating system. That's what TomTom have done here using the ARM code set.
This review covers both TomTom Navigator 5 for the Pocket PC and TomTom Navigator 5 for the Palm OS. This review does not cover the new TomTom Bluetooth GPS Receiver or any other hardware at the time of writing this review, hardware reviews will come later when we receive hardware review samples.
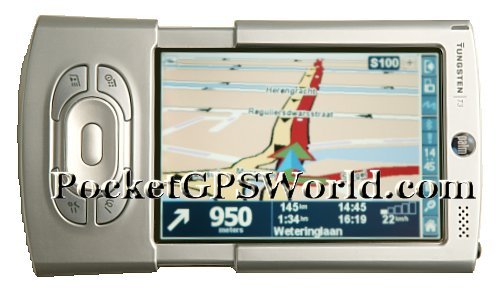
Compatibility
TomTom currently don't list which Pocket PC's are supported by Navigator 5. A comprehensive list will come later.
- TomTom wireless GPS receiver
- MMC Memory card with pre-installed application and map (Size dependent on Country, the UK Version is 128Mb)
- User Manual CD containing user guides for software and GPS unit
- Cigarette lighter charger cable for GPS receiver
- Combined Installation & Quick Start Guide poster

Note: No PDA is included in this package although retailers will no doubt be offering bundles with compatible PDA's.
Map Coverage
TomTom Navigator 5 is available for the following map areas:
- Germany
- Germany / Alps
- Benelux
- France
- Great Britain
- Italy
- Iberia
- Scandinavia
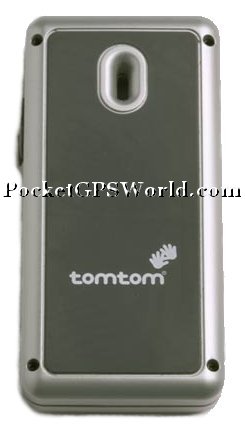 Hardware Hardware
TomTom Navigator 5 comes complete with the New TomTom Bluetooth GPS Receiver. This uses the latest SiRF III chipset and TomTom suggest that it should keep powered up for most of the day.
We haven't had the chance to review the GPS but will review it as soon as we receive a review sample.
The original TomTom BT GPS wasn't without problems; units suffered a high failure rate and because the car cradle was suspected to be the cause it was withdrawn. The quality problems appear to have been resolved now but the Car Cradle is no longer supplied nor is it available as an option.
Lets hope the new BT GPS isn't dogged by similar problems!
Software Installation
All the required software is supplied pre-installed on the SD Memory Card. As soon as you insert this into your Palm or Pocket PC the installation will auto-run and you will be ready to use the application in seconds. No need for access to a PC to perform the installation here!
Display
TomTom Navigator 5 uses the common platform navigation engine. Palm and GO users will already have experienced this navigation engine so you should be right at home. For Pocket PC users, the display will look a little different both in terms of menu structures, but also the Safety Screen customisation.
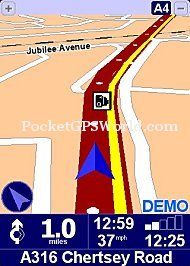
The navigation display presents all the information you require on a single screen. In the top 4/5ths of the screen is the map view and at the bottom is the information bar which displays next turn information, distance to next turn, distance to destination (DTD), estimated time of arrival (ETA) and remaining journey time. Below this is an information bar which provides the name of the road or street you are currently on.
  
 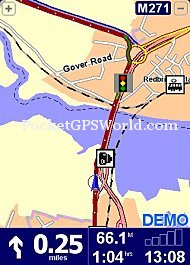 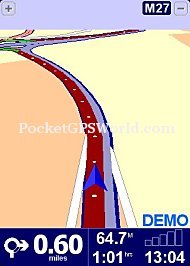
  
One thing TomTom Navigator 3 users may also notice straight away is the turn directions on the Safety Screen are much richer showing the correct turn rather than an approximated one.
Menu Structure
TomTom have done a good job on the menu system, making it easy to select using a finger or a stylus. Using your finger when on the move can be a lot easier, but will obviously put fingerprints and smudges on your PDA screen.
Existing TomTom Navigator Palm users will notice a change here on the menus. TomTom have included an Advanced planning mode, Itinerary Planning mode, TomTom Weather, Downloads, Call Number just as a few enhancements that you'll notice in TomTom Navigator 5. Some of these features were already available in TomTom Navigator 3 for the Pocket PC like Itinerary, ability to browse a route etc, but weren't available on the new core navigation platform engine until now.
  
Address Entry (Navigate to..., Advanced Planning, and Itinerary Planning)
Creating a destination is simple with TomTom Navigator 5. Simply select the Navigate To menu option, Advanced Planning or Itinerary Planning and you can then start adding your destination address. Using the keypad to spell out letters like you would when texting by pressing 5 three times to get L allows you to type in alphabetical and numerical addresses.
Once you have chosen one of the above options, you will then be greeted by the navigation entry screen. For Navigate to... you'll see the three screens below.
  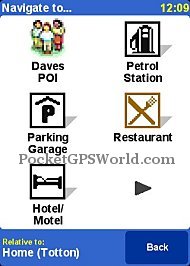
The first Navigation Destination screen is identical to the original TomTom Navigator 5 version, but the second screen shot above will show something different. Yes! That's Postcodes! No, not 5 digit postcodes but 7 digit UK postcodes! In-fact, UK users andNetherlands users will rejoice here as full postcodes are supported in these countries!
TomTom Navigator 5 also adds the ability to navigate to the centre of a town (City Centre) and also now to a POI in the City of your choice.
Drilling down through the categories you'll also see your custom POI groups you may have loaded to the TomTom Navigator 5 directory.
  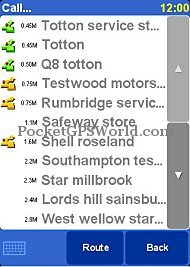
Entering an address allows you to select the city, street name and then house number.
  
Or you can now use postcodes to enter an address...
  
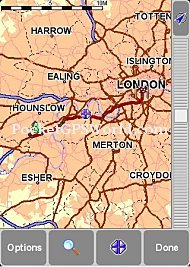
On completion of entering the address the route will be calculated and an overview map displayed showing the planned route.
As with previous TomTom products, voice instructions are clear and concise using Ogg Vorbis files that have been designed especially for loud vehicles.
Calculated routes are generally very good and you can choose to have it calculate an alternative or indeed avoid entire sections of road if you prefer.
Preference Options
Accessing the preferences sub-menu provides you with a plethora of options to choose from.
  
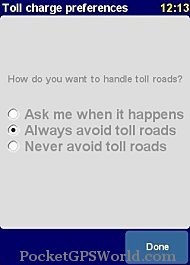
Planning Preferences, Toll Charge Preferences are new features across the board. This also allows for the London Congestion Zone and other toll roads to be avoided en-route. Compass and Status Bar Preferences are not new to TomTom Navigator 3 users on the Pocket PC, but it's a welcome edition to see these features added back in to the core navigation platform engine. We'll go into depth in these features a little later. Another new feature is the Show/Hide Tips which is a good feature for newbies allowing you to receive pop-up tips on-screen when performing specific functions.
  
Planning Preferences
A new feature in TomTom Navigator 5 is Advanced Planning and Planning Preferences. It allows you to plan a route before you leave the house. You can select to browse the route by text (screen shot 2 below), browse the route by images (screen shot 3 below).
  
Browse map of route (screen shot 1 below), Show route demo (screen shot 2 and 3 below).
  
So now not only can you receive instructions of the route prior to driving it, but see a screen shot slide show or actually drive the route in demo mode with full voice instructions.
Planning and Toll Charge Preferences
Two new features are the Planning Preferences screen below allowing you to tailor and customise your journey to various preferences like fastest or shortest route, avoidance of motorways etc and the Toll Charge Preferences screen below.
Itinerary Planning
Another new feature seen in TomTom Navigator 5 is Itinerary Planning. First seen on TomTom Navigator 3 and added onto TomTom GO and Palm OS, now sees Itinerary Planning on TomTom Navigator 5. This simply allows you to create multiple destination points.
 
Itinerary also allows you to save and re-load an existing itinerary that you saved, which means if you have a regular set of clients or businesses you want to drive to in a manually sorted way, then you can save this for later use and retrieve it when you go to re-drive the journey.
Compass Preferences
A new feature in TomTom Navigator 5 is the ability to show the Compass on the main screen display.
  
Mobile GPRS Features
Many TomTom Navigator 3 users will have already experienced Traffic. Traffic is also now available on TomTom Navigator 5 as well as TomTom Weather and extra Downloads. Providing you have created a TomTom Navigator 5 account and are paying the subscription fee you will be able to access these services over a GPRS GSM connection.

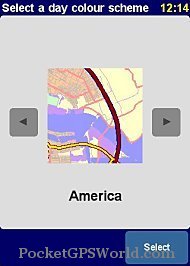
Colour Schemes
In common with other TomTom variants, there are many options to customise the display colour's both for daytime and night time display modes.
Voice Prompts
The voice prompts used for navigation can be changed by selecting either a different language, or a different person within your local language. For UK users, Tim and Jane are the default voices available. As previously stated, TomTom have now gone for the Ogg Vorbis format which gives very loud and clear and concise verbal instructions at MP3 quality (if not better) and at a much smaller size!
  
POI Warning
Pocket PC users of TomTom Navigator 3 will have been used to no POI Warning functions. In-fact you had to wait for third party developers to code an application using the TomTom Navigator SDK kit to create products like CheckPOInt, POI-Warner and GPSAssist to name a few. Well, TomTom have changed this and have been listening to common public feedback and have now integrated their own warning system into the core navigation platform engine, so this is now seen in TomTom Navigator 5, GO 5, and Mobile 5.
TomTom Navigator 5 comes with a huge array of pre-installed POI's including petrol stations, car parks, railways stations, cash points etc and has full support for all the 3rd party POI's available for TomTom Navigator.
Configuration is a simple process:-
1. Load your chosen POI file into the Map Folder on your storage card using Explorer.
2. Start TomTom Navigator 5.
3. Access the 'Maintain POI' menu and enable the POI. All that remains is for you to select 'Warn when near POI', select the distance before the POI that you wish to receive an alert and choose from the supplied warning sounds.
The supplied sound choices are limited and cannot currently be changed by the user, TomTom will change this later with their TomTom Plus service, or you can use some of the customised voices we have created here at PocketGPSWorld.com.
  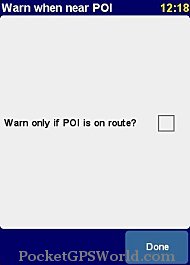
An added feature is the ability to choose to receive warning only on the planned route. This is intended to reduce false alerts for POI's off route but needs to be used with caution as you may end up missing some locations, if as is likely this is being used for Safety Camera warnings that could be costly!
When you are on the road and a POI Alarm is triggered you will see the POI highlighted in Red, the chosen alarm will sound and another indicator at top left of screen will show the distance to the POI.
  
How to transfer POI's to TomTom Navigator 5
This is something we are constantly asked, and believe me it's not rocket science. If you have never used ActiveSync before then you need to go and read a tutorial on it, or at least read the ActiveSync Manual first!
Secondly all you need to do is download the relevant ZIP file from our TomTom POI Page. Open the ZIP file and extract the OV2 and BMP file to a directory on your C: drive. Once extracted, connect your Pocket PC with the ActiveSync cable/cradle or take out the SD card from your Pocket PC or Palm and place it in a Storage Card Reader. If you have ActiveSync installed (PPC), it should pop up within a few seconds and show a green connection icon.
Simply click EXPLORE from ActiveSync on the PC, browse to your \Storage Card and then the country map directory (e.g. \Great Britain) and copy the corresponding BMP and OV2 files that you extracted earlier to this country directory. If using a Storage Card reader, just copy the contents to the country directory on the storage card. If you don't know how to copy files from one Explorer window to another, then either read your Windows Manual, click START | HELP or ask someone to do this for you.
Voila, that's it. They're now in TomTom Navigator 5. Simply restart TomTom Navigator 5, go into the Manage POI screen and enable the new POI (it will show on the list) and likewise if you've downloaded the safety camera database you may want to go into the Manage POI screen and then Warn When Near POI and configure this.
If you are not seeing the POI then you've done something wrong, go back and read the bare basics on how to use ActiveSync (as this review will not cover this) or post a question in the forums!
|